
 Carmen J. Moore

Photography enthusiasts know the struggle of capturing stunning shots in unpredictable weather conditions. Rain can be a major threat to your expensive DSLR camera, but fear not! With a little creativity and some basic materials, you can craft your own rain cover to shield your gear from the elements.


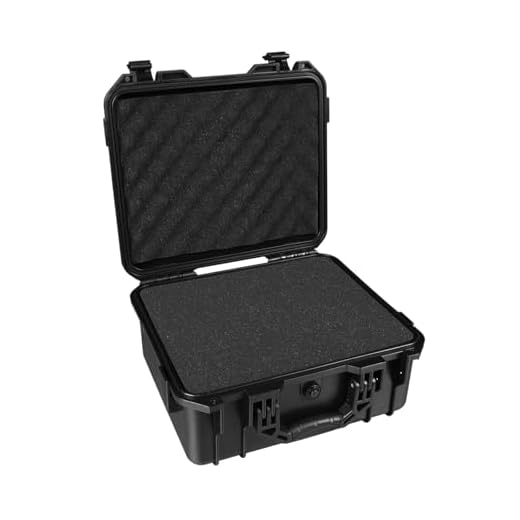
Why spend money on expensive rain covers when you can make one yourself? This DIY project is not only cost-effective but also allows you to customize the cover to fit your camera perfectly. Whether you’re a professional photographer or a hobbyist, protecting your equipment is essential to ensure it lasts for years to come.
Follow our step-by-step guide to create a simple yet effective rain cover for your DSLR camera. Say goodbye to worrying about rain ruining your photography adventures and hello to capturing amazing shots in any weather!
Essential materials for making a rain cover
When creating a rain cover for your DSLR camera, it is important to have the right materials to ensure maximum protection. Here are the essential items you will need:
| 1. Waterproof fabric |
| 2. Scissors |
| 3. Tape measure |
| 4. Sewing machine or needle and thread |
| 5. Velcro or elastic bands |
| 6. Grommets or eyelets |
| 7. Rubber bands |
Step-by-step guide to creating a DIY rain cover
Protecting your DSLR camera from rain is essential to ensure its longevity and functionality. Follow these steps to create a simple and effective rain cover for your camera:
Materials:
- Clear plastic bag large enough to fit over your camera and lens
- Scissors
- Rubber bands or tape
Instructions:
- Cut a hole in the bottom of the plastic bag for the lens to fit through.
- Slide the bag over the camera, making sure the lens fits through the hole.
- Secure the bag around the lens with rubber bands or tape to prevent water from entering.
- You now have a DIY rain cover to protect your camera from the elements while shooting in wet conditions.
Tips for ensuring waterproof protection
When making a rain cover for your DSLR camera, it’s important to ensure that it provides adequate waterproof protection. Here are some tips to help you achieve this:
- Use waterproof materials: Choose a material that is waterproof, such as waterproof nylon or PVC, to ensure that water doesn’t seep through.
- Seal all seams: Make sure to seal all seams and edges of the cover with waterproof tape or seam sealer to prevent water from getting in through any gaps.
- Ensure a snug fit: The rain cover should fit snugly around your camera to prevent water from seeping in at the openings. Use drawstrings or elastic to adjust the fit as needed.
- Test it out: Before heading out into the rain, test the rain cover by spraying it with water to check for any leaks. Make any necessary adjustments before using it in wet conditions.
Testing the effectiveness of your rain cover
Once you have created your DIY rain cover for your DSLR camera, it’s important to test its effectiveness before taking it out in the elements. Here are some steps to follow:
1. Water droplet test: Sprinkle some water on the rain cover to see if it beads up and rolls off or if it soaks through. This will give you an idea of how waterproof the cover is.
2. Fit test: Place the rain cover over your camera and make sure it fits snugly without any gaps or loose areas. This will prevent water from seeping in during use.
3. Mobility test: Move around with your camera while the rain cover is on to see if it restricts your movements or access to camera controls. It should allow you to shoot comfortably in different positions.
4. Durability test: Gently tug on the rain cover to see if it holds up well and doesn’t tear easily. It should be able to withstand some wear and tear during use.
By testing your DIY rain cover thoroughly, you can ensure that it will provide adequate protection for your DSLR camera in rainy conditions.
Maintenance and care of your homemade rain cover
After using your homemade rain cover, it’s important to properly clean and store it to ensure its longevity and effectiveness. Here are some tips for maintaining and caring for your rain cover:
- After each use, gently shake off any excess water and dirt from the cover.
- If the cover is dirty, gently hand wash it with mild soap and water. Avoid using harsh chemicals or scrubbing too vigorously.
- Allow the cover to air dry completely before storing it to prevent mold or mildew growth.
- Store the rain cover in a cool, dry place away from direct sunlight and extreme temperatures.
- Regularly inspect the cover for any signs of wear and tear, such as rips or loose seams, and repair them promptly to maintain the cover’s waterproofing properties.
Advantages of using a custom rain cover for your DSLR camera
Protecting your DSLR camera from rain and moisture is essential to ensure its longevity and performance. Using a custom rain cover offers several advantages:
1. Weatherproofing:
A custom rain cover provides a tight seal around your camera, preventing water from seeping in and damaging sensitive electronic components. This helps to protect your camera from rain, snow, and other harsh weather conditions.
2. Easy access:
Most custom rain covers are designed with convenient openings and access points, allowing you to easily adjust settings, change lenses, and access buttons and controls on your camera without having to remove the cover.
By investing in a custom rain cover for your DSLR camera, you can enjoy peace of mind knowing that your gear is well-protected in challenging weather conditions.
FAQ
What materials do I need to make a rain cover for my DSLR camera?
To make a rain cover for your DSLR camera, you will need a waterproof material such as nylon or plastic, a sewing machine or needle and thread, scissors, Velcro or elastic straps, and a measuring tape. These materials will help you create a custom rain cover that fits your camera perfectly and protects it from rain and moisture.
Can I buy a rain cover for my DSLR camera instead of making one?
Yes, you can definitely buy a rain cover for your DSLR camera instead of making one. There are many options available on the market, ranging from simple plastic covers to more advanced waterproof camera cases. Buying a rain cover can save you time and effort, especially if you need one quickly or don’t have the materials or skills to make one yourself.




Remember to test your DIY rain cover before using it in the field! It really helps to avoid surprises during a shoot.
Do you have any tips for sealing the seams? I’m worried about water getting in through the edges.
Great article! I can't wait to try making my own rain cover for the next photoshoot.
How do you test the DIY rain cover's effectiveness? What kind of leaks should I be on the lookout for?
It's best to perform a water droplet test to see if water beads up or soaks in. Check for any gaps around the seams and ensure it fits snugly around the camera.
Just a tip: testing the rain cover with a water droplet test saved me a lot of hassle before heading out!
I think buying a rain cover is worth it for the peace of mind. Making one sounds nice, but I wouldn’t want to risk my expensive camera with a DIY solution.
That's a valid point! While DIY solutions can be effective, investing in a commercially available rain cover can provide extra assurance for your gear.
I've seen some expensive commercial rain covers out there. How do they compare to a homemade one in terms of durability and ease of use? Would love to hear thoughts from others who’ve tried both!
I bought a commercial one, and while it’s more durable, I think a DIY cover can be just as effective for lighter rain. Plus, you can customize it!
Commercial rain covers often have additional features like access ports and reinforced seams, which can enhance usability in the field. However, a well-made DIY cover can be very effective for casual photographers.
When you say to seal all seams, does that mean I need to sew them as well, or can I just use waterproof tape?
You can use waterproof tape for a quick fix, but sewing can provide a more secure and long-lasting seal.
I don't think making a rain cover is worth the effort. I'd rather just buy one. It seems like too much work to get it right.
I tried making a rain cover using a trash bag once, and surprisingly, it worked pretty well for light rain. I just used rubber bands to secure it around my camera. Definitely a budget-friendly option!
I made my own rain cover last year following a similar guide, and it worked surprisingly well! I used a clear plastic bag and some rubber bands, just like suggested here. The fit was a bit tricky, but once I adjusted it, I was able to shoot in light rain without any issues. Just a tip: testing it with the water droplet test really helped me ensure it was sealed properly.
What kind of waterproof fabric do you recommend for making a rain cover? Is nylon good enough or should I go with something thicker?
I disagree with the idea that making a rain cover is cheaper than buying one. Sometimes the ready-made ones come with features that DIY just can't match, like better access to controls.
I tried making a rain cover using a large plastic bag and rubber bands. It worked surprisingly well for light rain! Just make sure the bag is big enough for your lens. I also added some duct tape around the seams for extra security. Definitely worth a try!