
 Carmen J. Moore
Helicopter drones have become increasingly popular in recent years due to their versatility and ability to capture stunning aerial footage. Building your own helicopter drone can be a rewarding and educational experience, allowing you to customize it to suit your specific needs and preferences.


Before you begin constructing your helicopter drone, it’s important to familiarize yourself with the basic components that make up a typical drone. These components include the frame, motors, propellers, flight controller, and battery. Understanding how these parts work together will help you build a stable and reliable helicopter drone.
Building a helicopter drone requires a combination of technical knowledge and practical skills. It’s essential to follow a step-by-step guide and pay attention to detail to ensure that your drone functions properly and safely. In this article, we will provide you with a comprehensive guide on how to make a helicopter drone from scratch.
Step-by-Step Guide to Making a Helicopter Drone
Creating your own helicopter drone can be a fun and rewarding project. Follow these steps to build your own flying machine:
| Step 1: | Research and gather necessary materials, including a frame, motors, propellers, flight controller, battery, and transmitter. |
| Step 2: | Assemble the frame according to the manufacturer’s instructions, ensuring all components fit securely. |
| Step 3: | Attach the motors to the frame, making sure they are positioned correctly for stability and lift. |
| Step 4: | Mount the flight controller and connect it to the motors, ensuring proper calibration for flight control. |
| Step 5: | Install the propellers on the motors, following the recommended direction for rotation. |
| Step 6: | Connect the battery to power the drone and ensure all components are functioning properly. |
| Step 7: | Program the transmitter to control the drone’s flight movements and test the drone in a safe, open area. |
| Step 8: | Make any necessary adjustments to the drone’s settings or components for optimal performance and stability. |
| Step 9: | Enjoy flying your homemade helicopter drone and continue to experiment with different configurations and upgrades. |
Collect Necessary Materials
Before you start building your helicopter drone, make sure you have all the necessary materials ready. Here is a list of items you will need:
- Drone frame
- Brushless motors
- Electronic speed controllers (ESCs)
- Flight controller
- Propellers
- Lipo battery
- Radio transmitter and receiver
- Power distribution board
- Motor mounts
- Screws and nuts
Optional Materials:
- GPS module
- Camera gimbal
- FPV system
Design Your Drone Structure
When designing the structure of your helicopter drone, it is important to consider the weight distribution, aerodynamics, and durability of the materials used.
1. Weight Distribution
Ensure that the weight of the components is evenly distributed across the drone to maintain stability and maneuverability. Place heavier components like the battery and motors at the center of gravity.
2. Aerodynamics
Design the body of the drone to reduce air resistance and improve flight efficiency. Use streamlined shapes and smooth surfaces to minimize drag.
Consider the placement of rotors and other elements to optimize airflow and reduce turbulence.
Tip: Experiment with different designs using computer-aided design (CAD) software to find the most aerodynamic shape for your drone.
3. Durability
Choose materials that are lightweight yet strong enough to withstand impacts and vibrations during flight. Carbon fiber, aluminum, and high-strength plastics are commonly used for drone frames.
Reinforce critical areas like the motor mounts and landing gear to prevent damage in case of a crash.
Assemble the Drone Frame
Once you have gathered all the necessary parts, it’s time to start assembling the drone frame. Follow these steps to build the basic structure of your helicopter drone:
- Begin by attaching the motors to the frame according to the manufacturer’s instructions.
- Secure the flight controller board onto the frame using screws or mounting tape.
- Connect the ESCs (Electronic Speed Controllers) to the motors and the flight controller board.
- Attach the landing gear to the frame to provide stability during takeoff and landing.
- Mount the battery securely onto the frame, making sure it is well-balanced for optimal flight performance.
Once you have completed these steps, your drone frame should be ready for the next stage of assembling the drone components.
Install Motors and Propellers
Once you have assembled the frame of your helicopter drone, it’s time to install the motors and propellers. Follow these steps:
- Attach the motors to the designated mounting points on the frame using screws.
- Connect the motor wires to the flight controller according to the manufacturer’s instructions.
- Mount the propellers onto the motors, ensuring that they are securely attached.
Make sure to double-check all connections and tighten any loose screws before proceeding to the next step in building your helicopter drone.
Add Electronic Speed Controllers
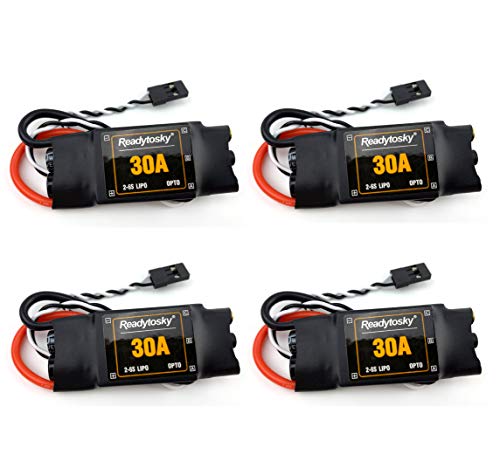
Electronic Speed Controllers (ESCs) are crucial components for controlling the speed of the motors on your helicopter drone. These devices regulate the power supplied to the motors based on input signals from the flight controller.
Choosing the Right ESCs
When selecting ESCs for your helicopter drone, consider factors such as the maximum current rating, compatibility with your motors, and the number of cells in your battery pack. Make sure to choose ESCs that can handle the power requirements of your setup.
Installation and Configuration
Mount the ESCs securely on the frame of your drone and connect them to the flight controller according to the manufacturer’s instructions. You may need to configure the ESCs using a programming card or software to ensure they work correctly with your motors and flight controller.
| Feature | Description |
|---|---|
| Current Rating | Specifies the maximum current that the ESC can handle without overheating. |
| BEC Output | Some ESCs have a Battery Eliminator Circuit (BEC) that provides power to the flight controller and other electronics. |
| Programming Options | Allows you to adjust settings such as motor direction, timing, and brake strength. |
Connect Flight Controller
Once you have all the necessary components assembled, it’s time to connect the flight controller. The flight controller is the brain of your helicopter drone, responsible for stabilizing the aircraft and controlling its movements.
Start by carefully reading the user manual of your flight controller to understand its specific wiring requirements. Typically, you will need to connect the flight controller to the power distribution board, ESCs (Electronic Speed Controllers), and receiver.
Wiring Steps:
1. Power Distribution Board: Connect the flight controller to the power distribution board using the provided cables. Make sure to match the positive and negative terminals correctly.
2. ESCs: Connect each ESC to the flight controller according to the motor layout diagram. Ensure that the signal wires are connected to the correct pins on the flight controller.
Once all the connections are made, double-check the wiring to ensure everything is properly connected. You can then proceed to configure the flight controller settings using the software provided by the manufacturer.
Attach Camera and Gimbal
One of the key features of a helicopter drone is the ability to capture aerial footage. To do this, you will need to attach a camera and gimbal to your drone. The camera will capture the footage, while the gimbal will help stabilize the camera and ensure smooth shots.
When attaching the camera and gimbal, make sure to follow the manufacturer’s instructions carefully. Most drones come with mounting points specifically designed for cameras and gimbals. Securely attach the camera and gimbal to these mounting points using the provided screws and hardware.
Once the camera and gimbal are securely attached, make sure to test them out before flying your drone. Check the camera angle, gimbal stabilization, and ensure that the footage is being captured properly. Adjust the settings as needed to achieve the desired results.
With the camera and gimbal properly attached and tested, you are now ready to take your helicopter drone to the skies and capture stunning aerial footage!
Test and Calibrate Your Drone
Before flying your helicopter drone, it is important to test and calibrate it to ensure optimal performance and stability. Follow these steps to test and calibrate your drone:
1. Check the Connections
Make sure all the connections between the components of your drone are secure and properly connected. This includes the motors, propellers, flight controller, and battery.
2. Test the Motors
Run a motor test to ensure that each motor is spinning in the correct direction and at the correct speed. This can be done using a drone testing tool or software.
- Check each motor individually to verify its function.
- Adjust the motor direction and speed as needed.
By testing and calibrating your drone before flight, you can minimize the risk of crashes and ensure a smooth flying experience.
Enjoy Flying Your Homemade Helicopter Drone
Now that you have successfully built your own helicopter drone, it’s time to enjoy the fruits of your labor. Here are some tips to enhance your flying experience:
- Find an open area: Choose a spacious, open area free from obstacles to fly your drone safely.
- Check the weather: Ensure that the weather conditions are suitable for flying your drone to avoid any accidents.
- Practice makes perfect: Spend some time practicing flying your drone to improve your skills and maneuvers.
- Capture breathtaking footage: Use the camera on your drone to capture stunning aerial shots and videos.
- Invite friends: Share the joy of flying your homemade drone with friends and family for a memorable experience.
FAQ
What materials are needed to build a helicopter drone?
To build a helicopter drone, you will need materials such as a frame (usually made of lightweight materials like carbon fiber or aluminum), motors, propellers, flight controller, battery, radio transmitter, receiver, and various electronic components like ESCs (Electronic Speed Controllers) and sensors.
Is it difficult to build a helicopter drone from scratch?
Building a helicopter drone from scratch can be a challenging but rewarding experience. It requires knowledge of electronics, programming, and mechanical assembly. You will need to understand how to select the right components, solder connections, program the flight controller, and tune the drone for stable flight. However, with the right resources and guidance, building a helicopter drone can be a fun and educational project.


Can someone explain how the flight controller stabilizes the drone? I’m a bit confused about that part.
I recently built a helicopter drone using this guide. The step-by-step instructions were easy to follow! I struggled a bit with mounting the ESCs but after a few tries, it worked out fine. Just make sure to double-check all your connections before flying. I added a camera and it took some amazing footage. Really enjoyed the process!
I disagree with the notion that carbon fiber is the best option for drone frames. While it's lightweight, it can be brittle. There are other materials that can offer a good balance of strength and weight without the high cost.
That’s a fair point! I think it depends on personal preference and what you’re using the drone for. Some users prioritize weight, while others might want durability.
How does building a helicopter drone compare with buying a ready-made one? Is the performance worth the effort?
Building it yourself gives you customization options and a better understanding of how drones work. However, it takes time and effort. If you're after convenience, a ready-made drone might be the better choice.
What kind of frame material do you recommend for beginners? I’ve heard a lot about carbon fiber but it seems expensive.