
 Carmen J. Moore

If you’re looking to capture memories on the go, the Vivitar Mini Digital Camera is a great choice for its compact size and ease of use.
Whether you’re a beginner or a seasoned photographer, this pocket-sized camera can help you snap high-quality photos and videos wherever you are.
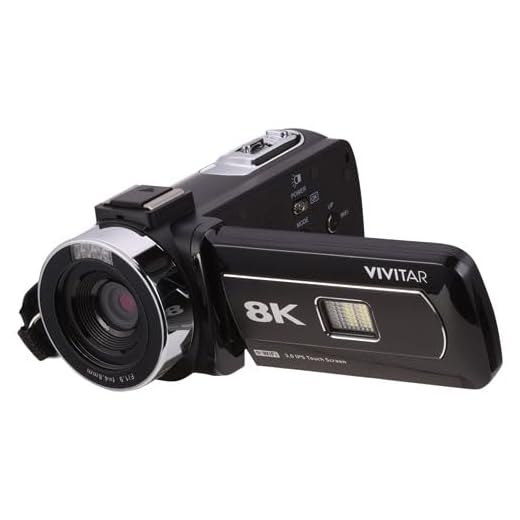


With its simple controls and user-friendly interface, learning how to use the Vivitar Mini Digital Camera is a breeze. In this guide, we’ll walk you through the basic functions and settings so you can start capturing your favorite moments in no time.
Getting started with your Vivitar mini camera
Congratulations on your new Vivitar mini digital camera! To help you get started, here are some basic tips and instructions on how to use your camera effectively.
Step 1: Inserting the batteries
Before using your camera, make sure to insert the required batteries. Open the battery compartment on the bottom of the camera and insert the batteries according to the polarity markings. Close the compartment securely.
Step 2: Inserting a memory card
To store your photos and videos, you will need to insert a memory card into the camera. Locate the memory card slot and carefully insert the memory card with the label facing the back of the camera. Make sure it clicks into place before closing the memory card slot cover.
| Function | Instructions |
| Power on/off | To turn on the camera, press and hold the power button until the screen lights up. To turn it off, repeat the same process. |
| Capturing photos | Press the shutter button halfway to focus, then fully to capture a photo. Make sure to hold the camera steady for best results. |
| Recording videos | Switch the camera to video mode and press the record button to start recording. Press the button again to stop recording. |
| Viewing photos/videos | Use the playback button to view the photos and videos you have captured. You can navigate through them using the arrow buttons. |
With these basic steps, you should be able to start using your Vivitar mini digital camera with ease. Explore the different features and settings to enhance your photography experience!

Understanding the basic functions of your camera
Before you start using your Vivitar mini digital camera, it’s important to understand the basic functions it offers. Here are some key features to familiarize yourself with:
- Power On/Off: Locate the power button on your camera to turn it on and off. This is usually indicated by a small icon that looks like a power symbol.
- Shooting Modes: Your camera may have different shooting modes such as auto, portrait, landscape, or sports. Experiment with these modes to see how they affect your photos.
- Zoom: If your camera has a zoom function, learn how to zoom in and out to get closer or farther away from your subject.
- Flash: Understand how to turn the flash on and off, or set it to auto mode. The flash can be useful in low-light situations.
- Reviewing Photos: Learn how to review the photos you’ve taken on the camera’s LCD screen. You may be able to delete or save photos directly from the camera.
By familiarizing yourself with these basic functions, you’ll be better equipped to use your Vivitar mini digital camera effectively and capture great photos.
Choosing the right settings for different situations
When using your Vivitar mini digital camera, it’s important to adjust the settings based on the situation you are shooting in. Here are some tips to help you choose the right settings:
1. Outdoor daytime photography
For bright outdoor conditions, set your camera to a low ISO to reduce noise and a high shutter speed to capture fast-moving subjects. Use a small aperture (high f-stop number) for a larger depth of field.
2. Low-light indoor photography
In low-light situations, increase the ISO to capture more light but be aware that this may introduce more noise. Use a wider aperture (low f-stop number) to allow more light into the camera.
Experiment with different settings to find the right balance between ISO, shutter speed, and aperture for each unique situation you encounter.
Tips for capturing high-quality photos with your Vivitar camera
1. Clean the lens: Before taking photos, make sure to clean the lens of your Vivitar camera to avoid any smudges or dirt that could affect the quality of your photos.
2. Use natural light: Whenever possible, try to take photos in natural light as it can greatly enhance the quality of your images. Avoid using the camera’s flash unless absolutely necessary.
3. Experiment with angles: Don’t be afraid to try different angles and perspectives when taking photos with your Vivitar camera. This can help you capture more interesting and dynamic shots.
4. Adjust settings: Take the time to familiarize yourself with the settings on your Vivitar camera and adjust them according to the lighting conditions and subject matter to achieve the best results.

5. Keep your camera steady: To avoid blurry photos, make sure to hold your Vivitar camera steady or use a tripod if necessary, especially in low-light situations.
6. Practice composition: Pay attention to the composition of your photos by framing your subjects carefully and considering elements like leading lines and the rule of thirds.
7. Edit your photos: After taking photos with your Vivitar camera, consider editing them using photo editing software to enhance colors, contrast, and sharpness for a polished final result.
Exploring the creative features of your camera
Once you have familiarized yourself with the basic functions of your Vivitar mini digital camera, it’s time to start exploring its creative features. Here are some tips to help you get the most out of your camera:
1. Experiment with different shooting modes
Your camera may have various shooting modes such as portrait, landscape, sports, and night mode. Try switching between these modes to see how they affect your photos. Portrait mode, for example, can help you capture stunning portraits with a blurred background, while landscape mode is ideal for capturing wide scenic views.

2. Use the built-in filters and effects
Many mini digital cameras come with built-in filters and effects that you can apply to your photos. Experiment with these filters to add a creative touch to your images. Some common filters include black and white, sepia, and vintage effects.
| Filter | Description |
| Black and white | Creates a classic and timeless look by removing color from the image. |
| Sepia | Gives your photos a warm, nostalgic tone reminiscent of old-fashioned photographs. |
| Vintage | Adds a vintage feel to your images with faded colors and a soft glow. |
By experimenting with different shooting modes, filters, and effects, you can unleash your creativity and take your photography to the next level with your Vivitar mini digital camera.
Transferring and storing your photos from the camera
Once you have taken some amazing photos with your Vivitar mini digital camera, you’ll want to transfer them to your computer for safekeeping or sharing. Here’s how you can do it:
- Connect your camera to your computer using the USB cable that came with the camera.
- Turn on your camera and select the option to transfer photos to your computer.
- Open the file explorer on your computer and locate the connected camera device.
- Copy the photos from the camera to a folder on your computer for easy access.
Storing and organizing your photos:
It’s important to properly store and organize your photos to keep them safe and easily accessible. Here are some tips:
- Create folders on your computer to categorize your photos by date, event, or location.
- Backup your photos regularly to an external hard drive or cloud storage to prevent data loss.
- Delete any unnecessary or duplicate photos to free up space and keep your collection organized.
Editing and enhancing your photos on a computer
After transferring your photos from your Vivitar mini digital camera to your computer, you can edit and enhance them using photo editing software. Here are some steps to help you make your photos look their best:
1. Crop and straighten
Use the cropping tool to remove any unwanted parts of the photo and adjust the composition. You can also straighten crooked horizons or lines to improve the overall look of the image.
2. Adjust brightness and contrast
Enhance the lighting in your photos by adjusting the brightness and contrast levels. This can help make your images more vibrant and appealing.
- Experiment with different levels to find the right balance.
- Be careful not to overdo it, as this can make your photos look unnatural.
By following these tips, you can take your photos from your Vivitar mini digital camera and turn them into stunning images that you’ll be proud to share with others.
Sharing your photos with friends and family
One of the best parts of using a Vivitar mini digital camera is being able to easily share your photos with your loved ones. Whether you want to show off your latest vacation snapshots or share special moments with friends, here are some tips on how to share your photos:
1. Transfer photos to your computer
The first step in sharing your photos is to transfer them from your camera to your computer. You can do this by connecting your camera to your computer using a USB cable and then transferring the files. Once the photos are on your computer, you can easily share them via email, social media, or by printing them out.

2. Use social media
Social media platforms like Facebook, Instagram, and Twitter are great ways to share your photos with a wider audience. Simply upload your photos to your account and add a caption to share the story behind the photo. You can also tag your friends and family in the photos so they can see them too.
| Tip: Make sure to set your privacy settings to control who can see your photos on social media. |
Troubleshooting common issues with the Vivitar mini camera
If you are experiencing issues with your Vivitar mini digital camera, here are some common problems and solutions:
1. Camera not turning on
- Check if the batteries are inserted correctly and fully charged.
- Try using new batteries to ensure the issue is not with the power source.
- Make sure the power button is functioning properly and not stuck.
2. Blurry or out-of-focus images
- Make sure the lens is clean and free of smudges or dirt.
- Check the focus settings on the camera and adjust them if needed.
- Hold the camera steady while taking photos to prevent blurriness.
If these troubleshooting steps do not resolve the issue, consider contacting Vivitar customer support for further assistance.
Resources for learning more about photography with your Vivitar camera
If you want to improve your photography skills with your Vivitar mini digital camera, there are plenty of resources available online to help you learn and grow as a photographer. Here are some recommended resources:
1. Online photography courses: Many websites offer online photography courses that cover everything from basic camera settings to advanced photography techniques. Look for courses specifically tailored to digital camera users.

2. Photography blogs and websites: There are numerous photography blogs and websites that offer tips, tutorials, and inspiration for photographers of all levels. Check out popular sites like Digital Photography School or PetaPixel.
3. YouTube tutorials: YouTube is a treasure trove of photography tutorials and how-to videos. Search for tutorials on topics like composition, lighting, and editing to enhance your photography skills.
4. Photography forums: Join online photography forums to connect with other photographers, ask questions, and share your work. Forums like DPReview or PhotographyTalk are great places to learn from others in the photography community.
5. Practice, practice, practice: The best way to improve your photography skills is to practice regularly. Take your Vivitar camera out and experiment with different settings, subjects, and lighting conditions. The more you practice, the better you’ll become!
FAQ
How do I turn on the vivitar mini digital camera?
To turn on the vivitar mini digital camera, locate the power button on the camera, usually located on the top or back of the device. Press and hold the power button until the camera screen lights up. Once the camera is on, you can start taking photos or videos.
How do I take a photo with the vivitar mini digital camera?
To take a photo with the vivitar mini digital camera, aim the camera at your subject and press the shutter button, typically located on the top or front of the camera. Make sure the camera is focused on the subject before taking the photo to ensure a clear image. You can also use the camera’s settings to adjust the exposure, white balance, and other features to enhance your photos.
Can I transfer photos from the vivitar mini digital camera to my computer?
Yes, you can transfer photos from the vivitar mini digital camera to your computer. To do this, you will need a USB cable that is compatible with the camera. Connect one end of the USB cable to the camera and the other end to your computer. Your computer should recognize the camera as a removable device, allowing you to access and transfer the photos stored on the camera’s memory card.
What type of memory card does the vivitar mini digital camera use?
The vivitar mini digital camera typically uses a microSD memory card to store photos and videos. Make sure to check the camera’s specifications or user manual to confirm the compatible memory card type and maximum storage capacity. Insert the memory card into the designated slot on the camera before capturing photos or videos to save them directly to the card.
How do I change the settings on the vivitar mini digital camera?
To change the settings on the vivitar mini digital camera, navigate to the camera’s menu by pressing the menu button, usually located on the back or side of the camera. Use the arrow buttons or touchscreen to scroll through the settings options, such as image resolution, flash settings, timer, and more. Select the desired setting and adjust it according to your preferences. Press the OK or select button to confirm the changes.



I don't find the Vivitar Mini's zoom feature very effective; it seems to lose quality when zooming in too much. Anyone else feel this way?
I actually had a different experience! The zoom works pretty well for me, especially in well-lit conditions.
What type of memory card does the Vivitar mini digital camera use? Is there a specific brand you would recommend?
The Vivitar mini digital camera typically uses a microSD card. Brands like SanDisk or Kingston are reliable choices.
I disagree with the tip about using natural light all the time. Sometimes, flash is necessary, especially indoors. It can enhance photos in low light situations!
I disagree that the Vivitar mini is easy to use for beginners. I found the settings a bit confusing at first. It took me a while to get the hang of it.
That's a valid point. While many users find it user-friendly, the learning curve can vary. Taking time to read the manual can help clarify its functions.
Don't forget to clean the lens before snapping pics! It really improves the quality.
I recently got the Vivitar Mini and I love how compact it is! I've been taking it on hikes and it's super easy to carry. I did find that in low light, the photos can be a bit grainy. Has anyone else noticed this?
How do I safely connect my Vivitar Mini to my computer without losing any photos?
To safely transfer photos, use the USB cable provided, select the transfer option on your camera, and make sure to properly eject the device from your computer once done.
I'm considering the Vivitar Mini versus another compact camera. Is the video quality any good on the Vivitar, or should I look elsewhere?
How does the Vivitar mini camera compare to other budget cameras like the Nikon Coolpix or Canon Powershot?
I'm new to using digital cameras. How do I know when to use the different shooting modes mentioned in the article?
Using natural light has definitely improved my photos! I also try to avoid the flash as much as possible.