
 Carmen J. Moore

Security cameras are an essential tool for monitoring and protecting your property. They capture footage of events happening around your home or business, providing valuable evidence in case of theft, vandalism, or other incidents. While security camera recordings are typically stored in video format, you may sometimes need to convert them to digital pictures for easier viewing and sharing.
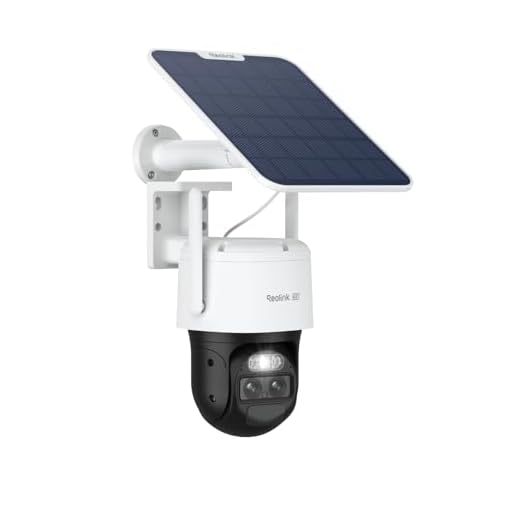


This article will guide you through the process of transferring security camera recordings to digital pictures. Whether you want to create snapshots of specific moments or share images with authorities, converting your video footage can be a useful skill to have.
Step-by-step guide on converting security camera footage to digital images
Converting security camera footage to digital images can be a useful way to save and share important moments captured by your surveillance system. Follow these steps to transfer your security camera recordings to digital pictures:
Step 1: Export the footage from your security camera system to a computer or external storage device.
Step 2: Use video editing software to open the footage and locate the specific frames you want to convert to images.
Step 3: Pause the video at the desired frame and take a screenshot using the appropriate keyboard shortcut.

Step 4: Save the screenshot as an image file (e.g., JPEG or PNG) on your computer.
Step 5: Repeat the process for each frame you want to convert to a digital image.
Step 6: Organize and store the digital images in a secure location for future reference or sharing.
By following these steps, you can easily convert security camera footage to digital images for various purposes, such as evidence collection, sharing with authorities, or creating a visual record of events.
Download the necessary software
Before you can transfer security camera recordings to digital pictures, you will need to download the appropriate software to your computer. There are several software options available online, such as Video Viewer, VLC Media Player, or Blue Iris. Make sure to choose a software that is compatible with your security camera system and computer operating system.

Once you have selected the software, visit the official website or a trusted software download platform to download the program. Follow the on-screen instructions to complete the download and installation process. Ensure that the software is properly installed and configured before proceeding to transfer the recordings to digital pictures.
Connect your security camera to the computer
To transfer security camera recordings to digital pictures, the first step is to connect your security camera to your computer. Follow these steps:
1. Locate the camera’s USB port
Find the USB port on your security camera. It is usually located on the back or side of the camera.
2. Connect the camera to the computer
Use a USB cable to connect your security camera to a USB port on your computer. Make sure the camera is powered on and recognized by your computer.
Access the camera footage
To transfer security camera recordings to digital pictures, you first need to access the camera footage. Follow these steps to access the footage:
| 1. | Log in to the camera system’s software using your username and password. |
| 2. | Navigate to the playback or recorded footage section of the software. |
| 3. | Select the date and time range for the footage you want to transfer. |
| 4. | Choose the camera or cameras from which you want to transfer the recordings. |
| 5. | Initiate the transfer process to save the footage to your computer or external storage device. |
Select the desired video clip
Once you have accessed the security camera recordings on your computer or storage device, navigate to the folder where the video clips are stored. Look through the list of files and identify the specific video clip that you want to convert to a digital picture.
Capture screenshots from the video
If you want to capture specific frames from your security camera recordings and save them as digital pictures, you can easily do so by following these steps:
- Open the video footage in your video player software.
- Pause the video at the frame you want to capture as a screenshot.
- Look for the screenshot option in your video player’s menu or use a keyboard shortcut (commonly “Print Screen” or “Ctrl + S”).
- Paste the screenshot into an image editing software like Paint or Photoshop.
- Save the screenshot as a digital picture in your desired format (e.g., JPEG, PNG).
By following these steps, you can easily extract specific frames from your security camera recordings and convert them into digital pictures for further use or analysis.
Edit and enhance the digital images
Once you have transferred the security camera recordings to digital pictures, you can further edit and enhance the images to improve their quality and clarity. Here are some tips to help you with this process:
1. Crop and resize:
Use image editing software to crop out any unnecessary parts of the image and resize it to the desired dimensions. This will help focus on the important details and make the image more visually appealing.

2. Adjust brightness and contrast:
You can adjust the brightness and contrast of the image to improve its overall quality. This can help enhance details that may be too dark or too light in the original recording.
By following these steps, you can enhance the digital images transferred from the security camera recordings and make them more useful for your purposes.
Save the images in the desired format
Once you have transferred the security camera recordings to digital pictures, you may want to save them in a specific format for easy viewing and sharing. Most commonly used image formats include JPEG, PNG, and TIFF.
1. JPEG:
JPEG is a widely supported image format that offers a good balance between image quality and file size. To save your images in JPEG format, simply select the option when saving the file from your image editing software.
2. PNG:
PNG is a lossless compression format that preserves image quality but may result in larger file sizes compared to JPEG. If you prioritize image quality over file size, saving your images in PNG format is a good choice.

Organize the digital images in folders
After transferring the security camera recordings to digital pictures, it is important to organize them in folders for easy access and management. Create separate folders for each camera location or specific time period to keep the images organized. You can also create subfolders within each main folder to further categorize the images based on specific criteria such as date, time, or event type. This will help you quickly locate and retrieve the images when needed, making it easier to review and analyze the footage effectively.
Backup and store the digital images securely
Once you have transferred the security camera recordings to digital images, it is crucial to back up and store them securely to prevent any data loss or tampering. Here are some tips on how to ensure the safety of your digital images:
1. Backup to multiple locations
It is recommended to create multiple copies of the digital images and store them in different locations. This could include external hard drives, cloud storage services, or network-attached storage (NAS) devices. By having backups in multiple locations, you can protect your data in case one copy becomes inaccessible or corrupted.
2. Encrypt your digital images
To add an extra layer of security, consider encrypting your digital images before storing them. Encryption helps protect your data from unauthorized access and ensures that only authorized individuals can view the images. There are various encryption tools available that can help you secure your digital images.
| Backup Option | Storage Capacity | Security Features |
|---|---|---|
| External Hard Drive | 1TB – 8TB | Password protection, hardware encryption |
| Cloud Storage | Depends on service provider | End-to-end encryption, two-factor authentication |
| Network-attached Storage (NAS) | Customizable based on drives | RAID protection, remote access |

FAQ
Can I convert security camera recordings to digital pictures?
Yes, you can convert security camera recordings to digital pictures. There are software programs available that can help you extract frames from the video footage and save them as individual images.
What is the benefit of transferring security camera recordings to digital pictures?
Transferring security camera recordings to digital pictures can make it easier to view and share specific moments captured on the footage. It can also help in preserving important images for future reference.
Are there any specific tools or software needed to transfer security camera recordings to digital pictures?
Yes, you may need video editing software or specialized tools that allow you to extract frames from video recordings. Some security camera systems also provide options to export footage as image files.
Is it a complicated process to transfer security camera recordings to digital pictures?
The process of transferring security camera recordings to digital pictures can vary in complexity depending on the tools and software you use. It may require some technical knowledge, but with the right resources, it can be a straightforward process.




I tried using VLC Media Player for this process, and it worked well for exporting stills. Just make sure to pause at the right frame!
Thanks for sharing your experience! VLC is a great choice for capturing screenshots, as it offers various options for playback control.
I think using external hard drives for backup is outdated. Cloud storage is way more convenient and safer.
What software do you recommend for taking screenshots from video footage?