
 Carmen J. Moore

Are you looking for a way to easily transfer your photos from your Sony digital camera to your computer? Whether you want to free up space on your camera or edit your photos on a larger screen, transferring your photos is a quick and simple process.
In this article, we will guide you through the steps to transfer photos from your Sony digital camera to your computer using different methods. You will learn how to connect your camera to your computer, transfer photos via USB cable, and use software for a seamless transfer.
Step-by-Step Guide: Transferring Photos from Sony Digital Camera to Computer
Transferring photos from your Sony digital camera to your computer is a simple process that allows you to back up your precious memories and free up space on your camera. Follow these steps to easily transfer your photos:



Step 1: Connect Your Camera to Your Computer
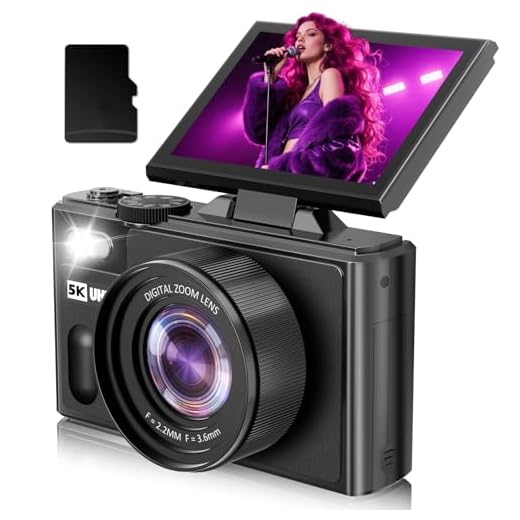
Use the USB cable that came with your Sony digital camera to connect it to your computer. Make sure both devices are turned on and properly connected.
Step 2: Access Your Camera’s Storage
Once your camera is connected, your computer should recognize it as a removable storage device. Open the file explorer on your computer and locate the camera’s storage drive.
Tip: If your camera is not recognized by your computer, make sure the USB connection is secure and try using a different USB port.
Step 3: Copy Photos to Your Computer
Once you have accessed your camera’s storage drive, you can simply drag and drop the photos you want to transfer to your computer. You can create a new folder on your computer to organize the photos if desired.
After copying the photos, safely eject your camera from your computer to avoid data corruption.

Following these steps, you can easily transfer photos from your Sony digital camera to your computer and enjoy sharing and storing your memories.
Install Sony Camera Software
Before transferring photos from your Sony digital camera to your computer, you may need to install the necessary software provided by Sony. This software is often included in the package when you purchase your camera or can be downloaded from the Sony website.
To install the Sony camera software, follow these steps:
- Insert the installation CD that came with your Sony camera into your computer’s CD drive.
- Follow the on-screen instructions to install the software.
- If you are downloading the software from the Sony website, locate the correct software for your camera model and operating system.
- Download the software and run the installation program.
- Follow the on-screen instructions to complete the installation process.
Connect Camera to Computer
Before transferring photos from your Sony digital camera to your computer, you need to connect the camera to the computer using a USB cable. First, locate the USB port on your camera and the corresponding port on your computer. Then, plug one end of the USB cable into the camera and the other end into the computer’s USB port. Make sure both devices are turned on and properly connected. Your computer should recognize the camera as a removable storage device, allowing you to access and transfer your photos.
Turn on Camera and Select Transfer Mode
Before transferring photos from your Sony digital camera to your computer, make sure to turn on your camera. You can do this by pressing the power button located on your camera.
Once your camera is turned on, navigate through the menu options to find the transfer mode. This mode is usually indicated by a symbol that looks like a computer or a USB icon. Select this mode to enable the camera to communicate with your computer for file transfer.
Open File Explorer on Computer
To transfer photos from your Sony digital camera to your computer, you will need to open File Explorer on your computer. File Explorer is the built-in file management application in Windows that allows you to browse and manage files and folders on your computer.
Locate Sony Camera in Devices
Once you have connected your Sony digital camera to your computer using a USB cable, you need to locate the camera in the devices on your computer.
1. On your computer, go to “My Computer” or “This PC” to see a list of connected devices.
2. Look for the Sony camera icon or a removable disk icon that represents your camera. It may be labeled as “Sony Camera” or have a generic name like “Removable Disk.”

Select and Copy Photos from Camera
After connecting your Sony digital camera to your computer, you will need to select and copy the photos from the camera to your computer. Follow these steps to transfer your photos:
- Open the folder or software program that allows you to access the files on your camera.
- Select the photos you want to transfer by clicking on them or using the select all option.
- Copy the selected photos by right-clicking and choosing the “Copy” option or using the keyboard shortcut (Ctrl+C).
- Open the folder on your computer where you want to save the photos.
- Paste the copied photos into the folder by right-clicking and choosing the “Paste” option or using the keyboard shortcut (Ctrl+V).
Once you have completed these steps, the selected photos will be transferred from your Sony digital camera to your computer, allowing you to access and manage them as needed.
Paste Photos into Computer Folder
Once the photos are copied to your computer, you can easily paste them into a specific folder for organization. Here’s how:
- Open the folder on your computer where you want to paste the photos.
- Right-click within the folder and select “Paste” from the drop-down menu.
- The photos will be pasted into the folder, and you can access them anytime from your computer.
Make sure to create separate folders for different events or categories to keep your photos organized and easy to find.
Safely Eject Camera from Computer
After transferring your photos from your Sony digital camera to your computer, it is important to safely eject the camera to avoid any data corruption or damage to the files.

Follow these steps to safely eject your camera:
| Step 1: | Make sure that all transfers are completed and the camera is no longer in use. |
| Step 2: | Locate the camera icon on your computer’s desktop or in the file explorer. |
| Step 3: | Right-click on the camera icon and select “Eject” or “Safely Remove Hardware.” |
| Step 4: | Wait for the system to confirm that it is safe to remove the camera. |
| Step 5: | Once you receive the confirmation message, you can safely disconnect the camera from the computer. |
Verify Photos Transfer Successfully
After transferring your photos from your Sony digital camera to your computer, it’s important to verify that the transfer was successful. Follow these steps to ensure that your photos are safely stored on your computer:
- Open the folder on your computer where you transferred the photos.
- Check that all the photos you transferred are present in the folder.
- Try opening a few random photos to ensure they open without any errors.
- Compare the number of photos in the folder with the number of photos on your camera to make sure none were missed during the transfer.
By following these steps, you can confirm that your photos have been successfully transferred from your Sony digital camera to your computer.
FAQ
How do I transfer photos from my Sony digital camera to my computer?
To transfer photos from your Sony digital camera to your computer, you can use a USB cable. Connect one end of the USB cable to your camera and the other end to a USB port on your computer. Your computer should recognize the camera as a removable storage device, allowing you to access and transfer the photos.
Can I transfer photos wirelessly from my Sony digital camera to my computer?
Yes, some Sony digital cameras support wireless transfer of photos to a computer. You may need to install specific software on your computer and configure the camera’s wireless settings. Once set up, you can transfer photos wirelessly without the need for a USB cable.
What software do I need to transfer photos from my Sony digital camera to my computer?
You may not need any additional software to transfer photos from your Sony digital camera to your computer. Most computers recognize cameras as storage devices and allow you to access and transfer photos directly. However, if you encounter any issues, you can use Sony’s PlayMemories Home software for a smoother transfer process.
Is it possible to transfer photos from a Sony digital camera to a Mac computer?
Yes, you can transfer photos from a Sony digital camera to a Mac computer. Connect the camera to the Mac using a USB cable or through wireless transfer if supported. The Mac should recognize the camera as a storage device, allowing you to import the photos using the Photos app or other image management software.
What should I do if my computer doesn’t recognize my Sony digital camera when trying to transfer photos?
If your computer doesn’t recognize your Sony digital camera when trying to transfer photos, try using a different USB port, a different USB cable, or restarting both the camera and the computer. Ensure that the camera is set to the proper transfer mode. If the issue persists, you may need to update the camera’s drivers or use a memory card reader to transfer the photos.




Thanks for the step-by-step guide! Quick question: does this process work the same way for all Sony digital camera models?
You mentioned selecting the transfer mode on the camera. What if I can't find this option? Is it usually in the main menu or settings?
Don’t forget to create a backup of your photos after transferring! You never know when you might need them.
Has anyone compared using USB vs. wireless transfer for photo quality? I’d like to know if there’s a difference in resolution or file size.