
 Carmen J. Moore

The mesmerizing natural phenomenon of the northern lights, also known as the aurora borealis, is a sight to behold. Capturing this breathtaking display of colors dancing across the night sky with your digital camera can result in stunning photographs that will leave you in awe. However, photographing the northern lights can be a challenging task that requires patience, skill, and the right techniques.
Whether you are a photography enthusiast or a beginner looking to capture the beauty of the northern lights, this guide will provide you with essential tips and tricks to help you take amazing photos. From choosing the right camera settings to finding the perfect location, we will walk you through the process of photographing the northern lights like a pro.
With the right preparation and a bit of practice, you can create images that showcase the magical dance of colors in the night sky. So, grab your camera, head out into the darkness, and get ready to capture the wonder of the northern lights in all their glory!



Choosing the right location
When photographing the northern lights with a digital camera, choosing the right location is crucial. Here are some tips to help you select the best spot:
- Find a location away from city lights to reduce light pollution and increase visibility of the aurora borealis.
- Look for open areas with unobstructed views of the sky to capture the full beauty of the northern lights.
- Consider the surrounding landscape for interesting compositions, such as mountains, lakes, or forests.
- Check the weather forecast and choose a location with clear skies to maximize your chances of seeing the aurora.
Understanding the camera settings
When capturing the mesmerizing beauty of the northern lights with your digital camera, it’s crucial to understand and adjust the camera settings to get the best results. Here are some key settings you need to consider:
1. Manual Mode:
Switch your camera to manual mode to have full control over the exposure settings. This allows you to adjust the aperture, shutter speed, and ISO according to the lighting conditions.
2. Aperture:
Set your aperture to a wide opening (low f-stop number) to let in more light and capture the faint details of the aurora borealis. A range between f/2.8 and f/4 is ideal for shooting northern lights.
Using a tripod for stability
When capturing the northern lights with a digital camera, using a tripod is essential to ensure stability and reduce camera shake. The long exposure times required to capture the aurora borealis make it crucial to keep the camera steady throughout the process. Here are some tips for using a tripod effectively:

Choosing the right tripod
Make sure to choose a sturdy tripod that can support the weight of your camera and lens. Look for a tripod that is easy to set up and adjust, allowing you to quickly position your camera for the best shots.
Setting up your tripod
Find a flat and stable surface to place your tripod on. Extend the legs fully and ensure that the tripod is level to avoid any tilting during the long exposure. Use the tripod’s height adjustment features to position your camera at the desired height and angle.
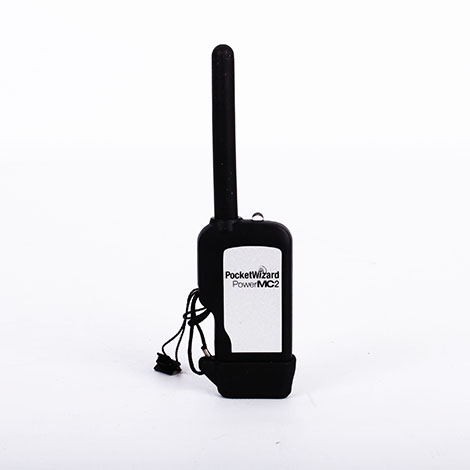
| Tip: | Use a remote shutter release or the camera’s self-timer function to minimize any vibrations caused by pressing the shutter button. |
Adjusting the focus for sharp images
When photographing the northern lights with a digital camera, it is crucial to adjust the focus properly to ensure sharp images. Follow these steps to achieve the best results:
| 1. Manual focus: | Switch your camera to manual focus mode to have full control over the focus. |
| 2. Infinity setting: | Set your lens to the infinity focus point, usually marked by the ∞ symbol. This will ensure that distant objects, such as the northern lights, are in focus. |
| 3. Live view: | Use the live view mode on your camera to fine-tune the focus by zooming in on a bright star or distant light source. Adjust the focus ring until the point of light appears sharp. |
| 4. Test shots: | Take a few test shots and review them on the camera’s LCD screen to check the sharpness of the images. Make adjustments as needed to ensure crisp results. |
Setting the white balance correctly
When photographing the northern lights with a digital camera, it is crucial to set the white balance correctly to capture the natural colors of the aurora borealis. The white balance setting determines how your camera interprets different colors under different lighting conditions.
For capturing the vibrant hues of the northern lights, it is recommended to set the white balance to “Daylight” or “Tungsten” mode. The “Daylight” setting works well for capturing the natural colors of the aurora, while the “Tungsten” mode can enhance the blue and green tones of the lights.

Tips for setting the white balance:
- Experiment with different white balance settings to find the one that best suits the lighting conditions and the colors of the northern lights.
- Avoid using the “Auto White Balance” mode as it may not accurately capture the colors of the aurora borealis.
Experimenting with different exposure times
When photographing the northern lights with a digital camera, it’s important to experiment with different exposure times to capture the beauty of the aurora borealis. Start by setting your camera to manual mode and adjusting the exposure time to a few seconds. Take a test shot and review the image to see if the lights are properly exposed.
If the lights appear too dark, try increasing the exposure time. On the other hand, if the lights are overexposed and appear too bright, decrease the exposure time. Keep experimenting with different exposure times until you find the perfect balance that captures the vivid colors and intricate patterns of the northern lights.
Remember, the ideal exposure time may vary depending on the brightness of the aurora and your camera settings. Don’t be afraid to play around with different settings to achieve the best results!
Avoiding Light Pollution
When photographing the northern lights with a digital camera, it is important to avoid light pollution as much as possible. Light pollution can diminish the visibility of the aurora borealis in your photos and reduce the overall quality of your images. Here are some tips to help you minimize light pollution:
- Choose a location away from city lights: Find a dark, remote location with minimal artificial light sources. This will allow you to capture the northern lights in all their glory without interference from light pollution.
- Turn off all unnecessary lights: Make sure to turn off any lights that are not essential for your photography setup. This includes car headlights, flashlights, and any other light sources that could contribute to light pollution.
- Use a lens hood: A lens hood can help block out unwanted light and reduce lens flare, improving the overall quality of your northern lights photos. Make sure to use a lens hood appropriate for your camera and lens.
Capturing the movement of the aurora
One of the most captivating aspects of photographing the northern lights is capturing the movement and dance of the aurora in the sky. To do this effectively with a digital camera, consider using a longer exposure time. A longer exposure allows the camera to capture the subtle shifts and swirls of the aurora, creating a mesmerizing effect in your photos.

Experiment with different exposure times to find the right balance between capturing the movement of the aurora and maintaining image sharpness. Start with exposures around 10-30 seconds and adjust as needed based on the intensity of the aurora and ambient light conditions.
Additionally, consider using a tripod to keep your camera stable during longer exposures. This will help prevent camera shake and ensure your photos are sharp and clear. You can also use a remote shutter release or the camera’s self-timer function to minimize any movement when pressing the shutter button.
Post-processing tips for enhancing the images
After capturing the northern lights with your digital camera, you can further enhance the images through post-processing techniques. Here are some tips to help you get the most out of your photos:
1. Adjust the exposure and white balance
Use photo editing software to adjust the exposure and white balance of your images. This will help bring out the colors of the aurora borealis and make them more vibrant.
2. Increase contrast and sharpen the details
To make the northern lights stand out even more, increase the contrast of the image and sharpen the details. This will make the lights appear more defined and eye-catching.

| Tip: Experiment with different editing tools and settings to find the combination that works best for your images. |
Sharing your stunning northern lights photos
After capturing the breathtaking beauty of the northern lights with your digital camera, you’ll likely want to share your stunning photos with friends and family. Here are a few tips on how to do so:
Social media: Share your northern lights photos on social media platforms like Instagram, Facebook, or Twitter. Use relevant hashtags to reach a wider audience and showcase your photography skills.
Photo sharing websites: Upload your photos to photo sharing websites such as Flickr or 500px. These platforms allow you to display your work to a community of fellow photographers and enthusiasts.
Print and display: Consider printing your favorite northern lights photos and framing them to hang on your wall or give as gifts. Physical prints can be a beautiful way to showcase your work.
Submit to contests: Look for photography contests or competitions that accept northern lights photos. This can be a great way to gain recognition for your work and potentially win prizes.

By sharing your northern lights photos, you can inspire others with the beauty of the natural phenomenon and showcase your talent as a photographer.
FAQ
What settings should I use on my digital camera to capture the northern lights?
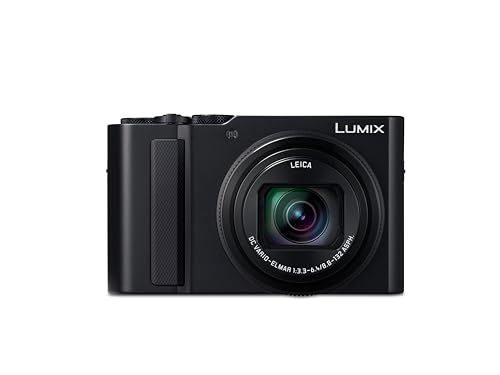
When photographing the northern lights with a digital camera, it is recommended to use a wide aperture (f/2.8 or wider), a high ISO (800-3200), and a long exposure time (10-30 seconds). Additionally, set your camera to manual mode to have full control over the settings and use a tripod to avoid camera shake.
Is it possible to capture the northern lights with a smartphone camera?
While smartphones have improved in their ability to capture low-light images, it can be challenging to photograph the northern lights with a smartphone due to their limited manual settings and sensor capabilities. For the best results, it is recommended to use a digital camera with manual controls and a tripod to capture the beauty of the northern lights effectively.



Remember to bring extra batteries! Cold weather drains them fast.
I disagree about using a tripod for every situation. Sometimes I prefer handheld for certain compositions, especially if I'm shooting a quick burst.
I tried photographing the northern lights last winter and found that using a low f-stop of 2.8 really helped to capture the colors more vividly. I also shot in manual mode, which made a big difference!
Can you clarify how to find the right exposure time? Is it just trial and error, or are there specific guidelines to follow?
I've read mixed opinions on using automatic white balance versus setting it manually. I usually go with the daylight setting, but I've seen others recommend tungsten. Which do you think gives better results?
What ISO settings do you recommend for photographing the northern lights?