
 Carmen J. Moore

The mesmerizing dance of the Northern Lights, also known as the Aurora Borealis, is a sight to behold. If you’re fortunate enough to witness this natural phenomenon, you’ll want to capture its beauty with your digital camera.
However, photographing the Northern Lights can be challenging due to the low light conditions and the fast-moving nature of the auroras. With the right techniques and settings, you can take breathtaking photos that will preserve the magic of this celestial display.



From choosing the right camera equipment to mastering exposure settings, this guide will help you unlock the secrets to capturing stunning photos of the Northern Lights. Get ready to create images that will transport you back to the awe-inspiring night sky filled with swirling colors and dancing lights.
Essential Tips for Capturing Northern Lights
Seeing and capturing the northern lights is a magical experience that requires some preparation and technique. Here are some essential tips to help you capture the beauty of this natural phenomenon:
1. Choose the Right Location
Find a location away from light pollution with a clear view of the northern horizon. This will increase your chances of seeing and photographing the aurora borealis.
2. Use a Tripod
Stability is key when photographing the northern lights. Use a sturdy tripod to keep your camera steady during long exposures.
3. Adjust Camera Settings

Set your camera to manual mode and adjust the settings to capture the faint light of the aurora. Start with an aperture of f/2.8 or lower, ISO around 800-1600, and a shutter speed of 10-30 seconds.
Remember to experiment with different settings to find the best combination for the conditions.
Choosing the Right Location
When photographing the northern lights with a digital camera, choosing the right location is crucial. Look for a spot away from light pollution, such as city lights, to capture the aurora borealis in all its glory. Consider locations with a clear view of the northern horizon to increase your chances of seeing the lights. Additionally, pay attention to the weather forecast and choose a location with clear skies to maximize your chances of capturing stunning photos of the northern lights.
Understanding Camera Settings
ISO: Set your camera’s ISO to a high value, such as 800-1600, to capture the faint light of the northern lights without introducing too much noise.
Aperture: Use a wide aperture, such as f/2.8 or lower, to allow more light to enter the lens and capture the auroras’ colors and details.

Shutter Speed: Set a slow shutter speed, around 15-30 seconds, to gather enough light for a well-exposed image of the northern lights.
Manual Focus: Switch your camera to manual focus mode and set the focus to infinity to ensure sharp images of the distant auroras.
Using a Tripod for Stability
One of the key factors in capturing clear photos of the northern lights with a digital camera is stability. Even the slightest movement can result in blurry images. To avoid this, it is highly recommended to use a tripod when photographing the aurora borealis. A sturdy tripod will keep your camera steady and allow you to capture sharp, focused images of the dancing lights in the sky.
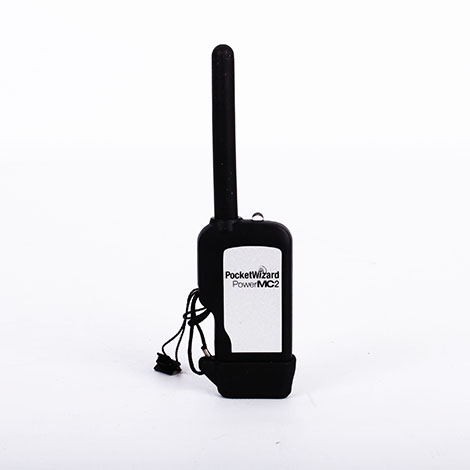
When setting up your tripod, make sure it is placed on solid ground and fully extended to the desired height. Adjust the tilt and pan of the tripod head to frame your shot correctly. Using a remote shutter release or the camera’s self-timer function can further minimize any vibrations caused by pressing the shutter button.
By using a tripod for stability, you can increase the chances of capturing stunning and crisp photos of the mesmerizing northern lights with your digital camera.

Adjusting White Balance for Best Results
When photographing the northern lights with a digital camera, it is important to adjust the white balance setting to achieve the best results. The default auto white balance setting may not capture the natural colors of the aurora borealis accurately.
Tip: Set your camera’s white balance to the “Tungsten” or “Fluorescent” mode to enhance the colors of the northern lights. Experiment with different white balance settings to find the one that works best for the specific lighting conditions.
By adjusting the white balance, you can capture the vibrant hues of the aurora borealis more accurately and create stunning photos that truly showcase the beauty of this natural phenomenon.
Experimenting with Exposure Times
One of the key factors in capturing the northern lights with your digital camera is the exposure time. Since the aurora borealis is a dynamic and ever-changing phenomenon, it’s important to experiment with different exposure times to find the optimal setting for your specific conditions.
Start by setting your camera to manual mode and adjusting the exposure time to a few seconds. Take a test shot and review the image on your camera’s display. If the aurora appears too dim or blurry, try increasing the exposure time in increments of a few seconds until you achieve the desired brightness and clarity.

On the other hand, if the aurora appears overexposed or washed out, shorten the exposure time accordingly. Keep in mind that the optimal exposure time can vary depending on the brightness of the aurora, the ambient light conditions, and other factors.
Consider using a tripod to keep your camera steady during long exposure shots and avoid camera shake. Additionally, you can experiment with different ISO settings and aperture values to further enhance the quality of your northern lights photos.
Post-Processing Techniques for Stunning Images
After capturing the northern lights with your digital camera, the post-processing stage is crucial for enhancing and perfecting your images. Here are some techniques to help you achieve stunning results:
- Adjust White Balance: Correct the color temperature to ensure the auroras appear natural and vibrant.
- Enhance Contrast: Increase contrast to make the lights pop and create a dynamic effect.
- Reduce Noise: Use noise reduction tools to clean up any graininess in your images, especially in low-light conditions.
- Sharpen Details: Apply selective sharpening to bring out the intricate patterns and textures of the northern lights.
- Crop and Straighten: Crop out distractions and straighten the horizon to improve the composition of your photos.
- Add Creative Filters: Experiment with filters to add artistic effects and enhance the mood of your aurora images.
By using these post-processing techniques, you can elevate your northern lights photos to the next level and create truly stunning images that capture the beauty of this natural phenomenon.
FAQ
What is the best camera settings for capturing the northern lights?
The best camera settings for northern lights photography include setting a wide aperture, using a high ISO, selecting a longer exposure time, and manual focus. It’s important to experiment with these settings to find the perfect balance for your specific conditions.

Do I need a tripod for taking photos of the northern lights?
Yes, using a tripod is essential for capturing sharp and clear images of the northern lights. A steady base will prevent any camera shake during the long exposures required for these low-light conditions.
What are the best locations for photographing the northern lights?
The best locations for photographing the northern lights are areas with low light pollution and high latitude, such as Norway, Iceland, Alaska, and Canada. These regions offer optimal conditions for viewing and photographing this natural phenomenon.



Using a tripod is a game changer! I made the mistake of not bringing one on my last trip, and my photos were all blurry.