
 Carmen J. Moore
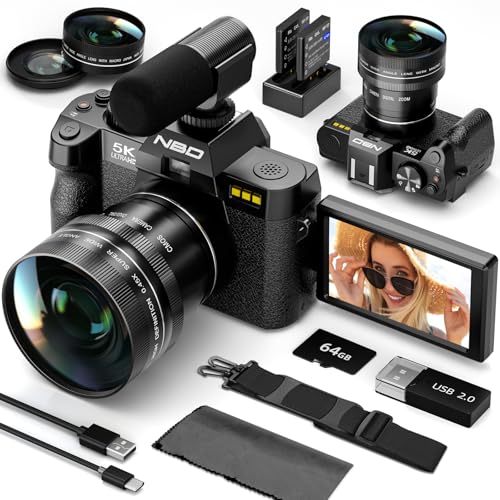
Astrophotography is a captivating hobby that allows you to capture the beauty of the night sky through the lens of your digital camera. Whether you’re a beginner or a seasoned photographer, taking stunning images of celestial objects like stars, planets, and galaxies can be a rewarding experience.
With the right equipment and techniques, you can create breathtaking astrophotographs that showcase the wonders of the universe. In this guide, we’ll explore the essential tips and tricks to help you master the art of astrophotography with your digital camera.
Beginners guide to taking stunning astrophotography
Are you new to astrophotography and want to capture stunning images of the night sky? Follow these simple steps to get started:




- Choose the right location: Find a spot away from city lights with clear skies for the best results.
- Use a sturdy tripod: Stability is key when capturing long exposure shots of the stars.
- Select the right camera settings: Set your camera to manual mode and adjust the aperture, ISO, and shutter speed accordingly.
- Familiarize yourself with the night sky: Use a star map or a stargazing app to locate interesting celestial objects.
- Experiment with different compositions: Try different angles and framing techniques to create visually appealing shots.
- Practice patience: Astrophotography requires time and practice to master, so don’t get discouraged if your first attempts don’t turn out as expected.
By following these tips and practicing regularly, you’ll soon be capturing stunning astrophotography images that will amaze and inspire others.
Choose the right digital camera
Choosing the right digital camera for astrophotography is crucial to capturing high-quality images of the night sky. Here are some key factors to consider:
1. Sensor Size
The size of the camera’s sensor is important for astrophotography. A larger sensor can capture more light and detail, resulting in better images of stars and galaxies. Look for cameras with APS-C or full-frame sensors for optimal performance.
2. Low Light Performance
Cameras with good low light performance are essential for astrophotography, as you’ll often be shooting in dark conditions. Look for cameras with high ISO capabilities and low noise levels to capture clear and sharp images of the night sky.
| Camera Model | Key Features |
| Canon EOS 6D Mark II | Full-frame sensor, excellent low light performance |
| Nikon D750 | Full-frame sensor, high ISO capabilities |
| Sony Alpha a7 III | Full-frame sensor, low noise levels |
Understand the basics of astrophotography
Astrophotography involves capturing images of celestial objects such as stars, planets, and galaxies using a camera. To get started with astrophotography, it’s important to understand the basics:

- Equipment: You will need a digital camera with manual settings, a sturdy tripod, and a remote shutter release to minimize camera shake.
- Location: Find a dark sky location away from city lights to minimize light pollution and improve visibility of celestial objects.
- Settings: Set your camera to manual mode and adjust settings such as ISO, aperture, and shutter speed to capture the night sky effectively.
- Focusing: Use manual focus and focus on a bright star or distant light to ensure sharp images of celestial objects.
- Composition: Experiment with framing and composition to create visually appealing astrophotography images.
Find a suitable location for shooting
When taking astrophotography with a digital camera, it’s crucial to find a location with minimal light pollution. Choose a spot away from city lights, preferably in a remote area or a dark sky reserve. This will ensure that your images are not washed out by artificial light and will capture the true beauty of the night sky.
Set up your digital camera for astrophotography
Before you start taking astrophotography with your digital camera, it’s important to set it up properly to capture stunning images of the night sky. Here are some key steps to prepare your camera:
1. Use a sturdy tripod: Stability is crucial for astrophotography, so make sure your camera is mounted on a sturdy tripod to avoid camera shake.
2. Set the camera to manual mode: To have full control over your camera settings, switch to manual mode rather than using automatic settings.
3. Adjust the focus: Set your camera to manual focus and adjust it to infinity to capture sharp images of stars and celestial objects.

4. Use a remote shutter release: To prevent camera shake when taking long exposure shots, use a remote shutter release or the camera’s self-timer function.
5. Set a wide aperture: A wide aperture (low f-stop number) allows more light to enter the camera, making it easier to capture faint stars and details in the night sky.
6. Experiment with exposure settings: Start with a relatively short exposure time (e.g., 15-30 seconds) and adjust the ISO and aperture settings to find the right balance for your desired astrophotography results.
7. Use manual white balance: Set the white balance to a fixed value suitable for nighttime shooting to avoid color casts in your astrophotography images.
By following these steps and experimenting with different settings, you’ll be well-equipped to capture breathtaking astrophotography with your digital camera.

Use the right camera settings for capturing stars
When capturing stars in astrophotography, it’s essential to use the right camera settings to achieve the best results. Here are some key settings to consider:
1. Manual mode: Set your camera to manual mode to have full control over the settings.
2. Shutter speed: Use a long exposure time to capture the faint light of stars. Start with a shutter speed of 15-30 seconds and adjust as needed.
3. Aperture: Choose a wide aperture (low f-stop number) to let in more light. An aperture of f/2.8 or lower is ideal for astrophotography.
4. ISO: Use a high ISO setting (800-3200) to make the stars appear brighter in the final image. Avoid going too high to prevent noise.

5. Focus: Set your lens to manual focus and adjust it to infinity to ensure the stars are sharp in the image.
By using these camera settings, you can capture stunning photos of the night sky and stars in your astrophotography adventures.
Experiment with different techniques and compositions
Once you have mastered the basics of astrophotography with your digital camera, it’s time to get creative and experiment with different techniques and compositions. Try capturing star trails by using a long exposure or create stunning silhouettes of trees or landscapes against the night sky.
Don’t be afraid to play around with different settings on your camera, such as adjusting the ISO, aperture, and shutter speed to achieve different effects. You can also try using different lenses or filters to enhance your astrophotography shots.
Remember that astrophotography is all about trial and error, so don’t be discouraged if your first few attempts don’t turn out as expected. Keep experimenting and refining your techniques to capture breathtaking images of the night sky.

Post-process your astrophotography images for best results
After capturing your astrophotography images, the next step is to post-process them to enhance the details and colors. Here are some tips to help you get the best results:
- Stack your images: To reduce noise and improve the signal-to-noise ratio, consider stacking multiple images of the same subject using software like DeepSkyStacker or Sequator.
- Adjust levels and curves: Use editing software like Adobe Photoshop or Lightroom to adjust the levels and curves of your image to bring out more details and contrast.
- Enhance colors: Boost the colors in your astrophotography images by adjusting the saturation and vibrance levels, but be careful not to overdo it.
- Reduce noise: Apply noise reduction techniques to smooth out any graininess in your images, but be careful not to lose too much detail.
- Sharpen the image: Use sharpening tools to enhance the details in your astrophotography images, but again, be careful not to oversharpen and introduce artifacts.
By following these post-processing tips, you can take your astrophotography images to the next level and create stunning photos of the night sky.
FAQ
What equipment do I need to take astrophotography with a digital camera?
To take astrophotography with a digital camera, you will need a camera with manual settings, a sturdy tripod, a remote shutter release or timer, and a fast wide-angle lens with a wide aperture. Additionally, a star tracker or equatorial mount can help capture longer exposures without star trailing.
How do I focus my camera for astrophotography?
To focus your camera for astrophotography, set your lens to manual focus and use live view mode on your camera. Point your camera at a bright star or distant light source, then zoom in on the live view screen and adjust the focus ring until the star or light source appears sharp. You can also use the infinity focus mark on your lens as a starting point.
What settings should I use on my digital camera for astrophotography?
For astrophotography, use a wide aperture (f/2.8 or wider), a high ISO (1600-3200), and a long exposure time (15-30 seconds). Experiment with different settings to find the best combination for capturing the night sky. Make sure to shoot in RAW format to have more flexibility in post-processing.

How can I reduce noise in my astrophotography images taken with a digital camera?
To reduce noise in your astrophotography images, you can try shooting at a lower ISO setting, using noise reduction in-camera or in post-processing software, taking dark frames to subtract noise, and stacking multiple images to improve signal-to-noise ratio. Additionally, using a lower temperature for long exposures can help reduce sensor heat noise.



What are some affordable camera options for someone just starting with astrophotography? I'm on a budget but want to capture the night sky effectively.
I've had good experiences with the Canon EOS Rebel series; they're relatively affordable and have decent low-light capabilities.
Great question! The Canon EOS Rebel series is indeed a solid choice for beginners. Another option could be the Nikon D5600, which is also budget-friendly and performs well in low-light conditions.
I tried astrophotography for the first time last weekend and followed the tips in this guide. I used a tripod, set my camera to manual mode, and experimented with different ISO settings. My first few shots were a bit blurry, but after adjusting the focus and trying longer exposures, I got some decent star shots! It really made me appreciate the beauty of the night sky. Anyone else have similar experiences?
Sounds like an awesome night! I struggled with focusing at first too, but now I just use a bright star as a benchmark. It's helped a lot.