
 Carmen J. Moore
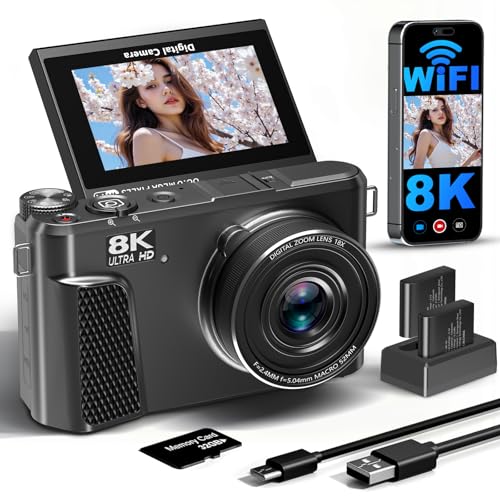
Are you eager to transfer your precious photos from your digital camera to your Mac computer? Look no further! In this comprehensive guide, we will walk you through the process step-by-step, ensuring a smooth and hassle-free importation of your images.
With the advancement of technology, importing photos from your digital camera to your Mac has become easier than ever. Whether you are a professional photographer or a casual enthusiast, knowing how to transfer your photos efficiently is essential in this digital age. Let’s dive into the details and get those photos onto your Mac in no time!



Step-by-Step Guide: Importing Photos from Digital Camera to Mac
Importing photos from your digital camera to your Mac is a simple process that can be done in a few easy steps. Follow this guide to transfer your photos quickly and efficiently:
Step 1: Connect Your Digital Camera to Your Mac
Start by connecting your digital camera to your Mac using a USB cable. Make sure your camera is turned on and set to the appropriate mode for transferring photos.
Step 2: Open the Photos App
Once your camera is connected, open the Photos app on your Mac. The Photos app will automatically detect your camera and prompt you to import the photos.
Note: If the Photos app does not open automatically, you can manually open it by clicking on the Photos icon in the Dock or searching for it in Spotlight.
Follow the on-screen instructions to select the photos you want to import and choose where you want to save them on your Mac.

By following these simple steps, you can easily import photos from your digital camera to your Mac and start editing and organizing them in no time.
Prepare Your Digital Camera
Before you can import photos from your digital camera to your Mac, you need to make sure your camera is ready for the process. Here are some steps to prepare your digital camera:
- Ensure your digital camera is fully charged or has fresh batteries to prevent any interruptions during the import process.
- Check the memory card in your camera and make sure it has enough space to store the photos you want to transfer.
- If your camera uses a specific cable to connect to your Mac, locate the cable and ensure it is in good working condition.
- Review the user manual of your digital camera for any specific instructions on how to connect it to a computer for photo transfer.
- If your camera uses a memory card, consider using a card reader to transfer the photos directly from the card to your Mac.
Connect Your Camera to Mac
Before importing photos from your digital camera to your Mac, you need to connect the camera to your computer using a USB cable. Here’s how you can do it:
- Turn on your digital camera.
- Locate the USB port on your camera.
- Connect one end of the USB cable to your camera’s USB port.
- Connect the other end of the USB cable to an available USB port on your Mac.
- Your Mac should detect the camera and prompt you to open a photo management application like Photos or Image Capture.
Using Photos App:
If the Photos app opens automatically, you can import photos by selecting the ones you want and clicking the “Import Selected” button. You can also choose to import all photos by clicking the “Import All New Photos” button.
Using Image Capture:
If the Image Capture app opens, you can select your camera from the list of devices and choose where to import your photos. You can then click the “Import” button to transfer the photos to your Mac.

Open Image Capture App
To import photos from your digital camera to your Mac, you can use the Image Capture app. Here’s how to open the Image Capture app:
- Connect your digital camera to your Mac using a USB cable.
- Launch the Image Capture app by clicking on the Launchpad icon in the Dock, searching for Image Capture, and then clicking on the app.
- Once the Image Capture app opens, your connected digital camera should appear in the list of devices on the left-hand side of the window.
Now that you have opened the Image Capture app, you can proceed with importing your photos from your digital camera to your Mac.
Select Your Photos
Once your digital camera is connected to your Mac, open the Photos app on your computer. You will see your camera listed under the Devices section in the sidebar. Click on your camera to view all the photos stored on it.
You can now select the photos you want to import by clicking on them. To select multiple photos, hold down the Command key on your keyboard while clicking on each photo. Once you have selected all the photos you want to import, click on the Import Selected button at the top of the screen.
Choose Import Destination
After selecting the photos you want to import, you will need to choose the destination where you want the photos to be saved on your Mac. Follow these steps:

| 1. | Click on the “Import To” option located at the top of the Photos app window. |
| 2. | A drop-down menu will appear with different options such as your Mac’s default Photos library, a specific folder, or a custom location. |
| 3. | Select the destination where you want to save the imported photos by clicking on the desired option from the drop-down menu. |
| 4. | Click on the “Import Selected” button to start importing the photos to the chosen destination. |
Review and Organize Imported Photos
Once you have successfully imported your photos from your digital camera to your Mac, it’s important to review and organize them for easy access and management. Here are some steps you can follow:
1. Review Photos
Take some time to go through the imported photos and delete any duplicates or unwanted images. You can use the built-in Photos app on your Mac to quickly scroll through the photos and select the ones you want to keep.
2. Organize Photos
Create folders or albums to organize your photos based on events, dates, or themes. This will make it easier to find specific photos later on. You can use the Photos app to create albums and drag and drop photos into them.
| Tip: | Consider adding keywords or tags to your photos to improve searchability. This can help you quickly find specific photos based on keywords you assign. |
|---|
Eject Your Camera Safely
Once you have transferred all the photos from your digital camera to your Mac, it is important to safely eject your camera to avoid any data corruption or damage to your device.
1. Make sure that all the files have been successfully transferred to your Mac before ejecting the camera.

2. Locate the camera icon on your desktop or in the Finder window.
3. Right-click on the camera icon and select the “Eject” option from the drop-down menu.
4. Wait for the system to safely eject your camera before disconnecting it from the USB port.
5. Once the camera has been ejected, you can safely unplug it from your Mac.
Following these steps will help ensure that your digital camera is safely disconnected from your Mac without any issues.

Clear Space on Your Camera
If your camera’s memory is almost full, you will need to clear some space before importing new photos to your Mac. Here are a few ways to free up space on your camera:
Delete Unwanted Photos and Videos
Go through your camera’s gallery and delete any photos or videos that you no longer need. This will create more space for new photos and make the importing process smoother.
Transfer Files to a Computer or External Drive
If you have important photos or videos that you want to keep but don’t need on your camera, transfer them to your computer or an external drive. This will help free up space on your camera for new photos.
Backup Imported Photos
Once you have imported your photos from your digital camera to your Mac, it is important to back them up to prevent any potential loss. There are several ways you can back up your imported photos:
1. External Hard Drive: Copy your imported photos to an external hard drive to create a duplicate copy. This will ensure that your photos are safe in case anything happens to your Mac.

2. Cloud Storage: Upload your imported photos to a cloud storage service like iCloud, Google Drive, or Dropbox. This will allow you to access your photos from anywhere and provide an additional layer of protection.
3. Burn to Disc: If you prefer physical backups, you can burn your imported photos to a CD or DVD. This is a good option for long-term storage and archiving.
Remember to regularly back up your photos to keep them safe and secure.
Enjoy Your Photos on Mac
Once you have successfully imported your photos from your digital camera to your Mac, you can now enjoy them in various ways. You can organize your photos into albums, edit them using photo editing software, and share them with friends and family on social media platforms. Take advantage of the built-in Photos app on your Mac to easily access and view your photos. You can also create slideshows, print your favorite photos, or set them as desktop wallpapers to personalize your Mac experience. With your photos safely stored on your Mac, you can relive your memories and cherish special moments whenever you want.
FAQ
How can I import photos from my digital camera to my Mac?
To import photos from your digital camera to your Mac, you can connect your camera to your computer using a USB cable. Once connected, open the Photos app on your Mac. Your camera should appear in the sidebar under Devices. Click on your camera, select the photos you want to import, and then click on the Import button. Your photos will be transferred to your Mac.

Is there a way to import photos from a digital camera to a Mac without using a USB cable?
Yes, you can import photos from a digital camera to a Mac without using a USB cable by using a memory card reader. Remove the memory card from your camera and insert it into the memory card reader connected to your Mac. Open the Photos app, and your memory card should appear in the sidebar under Devices. Select the photos you want to import and click on the Import button to transfer them to your Mac.
What should I do if my Mac is not recognizing my digital camera when I try to import photos?
If your Mac is not recognizing your digital camera when you try to import photos, try the following troubleshooting steps: 1. Make sure your camera is turned on and properly connected to your Mac. 2. Restart your Mac and try connecting the camera again. 3. Check if there are any software updates available for your camera or Mac. 4. Try using a different USB cable or port. If none of these steps work, you may need to consult the manufacturer’s website or contact customer support for further assistance.



I followed this guide to import my photos last weekend, and it worked perfectly! I was a bit hesitant about using the Image Capture app, but it was straightforward. I even managed to organize my photos into folders afterward. Just a heads up, make sure to have your camera fully charged; I had to wait for mine to charge up before starting the transfer!
Good article! I usually connect my camera to my Mac, but sometimes the Photos app doesn’t detect it. Any tips on troubleshooting that?