

As a professional photographer, I am often asked about the best settings for digital SLR cameras. While there is no one-size-fits-all answer to this question, I can certainly provide you with some guidance on how to achieve the best results in different shooting scenarios. Understanding your camera’s settings and how they can be adjusted to suit your needs is essential for creating stunning photographs.
Aperture, ISO, and shutter speed are the three key settings you need to understand when shooting with a digital SLR camera. Aperture controls the depth of field, or the amount of background blur in your photos. ISO determines the sensitivity of your camera’s sensor to light, which is crucial for shooting in different lighting conditions. Shutter speed dictates how long the camera’s sensor is exposed to light, allowing you to capture motion or freeze it in place.
In low-light situations, such as when shooting indoors or at night, it is important to use a wide aperture and a higher ISO to compensate for the lack of natural light. This will allow you to capture sharp and well-exposed images without the need for a flash. However, keep in mind that increasing the ISO too much can result in digital noise, so finding a balance is key.
When capturing fast-moving subjects, such as sports or wildlife, a fast shutter speed is essential to freeze the action and avoid motion blur. Along with a fast shutter speed, a higher ISO may also be necessary to ensure proper exposure. Additionally, using continuous autofocus and burst mode can help you capture multiple frames of the subject in quick succession, increasing your chances of getting the perfect shot.

For portraits and still life photography, a narrow aperture can be used to create a shallow depth of field and achieve a beautiful background blur. This helps to isolate the subject and draw attention to it. A lower ISO is usually sufficient in well-lit situations, as you can control the lighting and there is no need to capture any movement.
In conclusion, understanding the settings of your digital SLR camera is essential for achieving the desired results in your photography. Experimenting with different settings and understanding their effects will help you develop your own style and capture stunning images in any situation.
Choosing the Best DSLR Camera for Photography: Factors to Consider
When it comes to choosing the best DSLR camera for photography, there are several important factors to consider. As an aspiring photographer, I have spent a considerable amount of time researching and comparing different camera models to find the one that suits my needs. Here are some factors that I have found to be crucial in making a well-informed decision.
1. Image quality: One of the most important factors to consider when choosing a DSLR camera is its image quality. The camera should have a high-resolution sensor to capture sharp, detailed images. Look for cameras with a higher number of megapixels to ensure that you can capture stunning photos with rich colors and fine details.
2. Low light performance: Another crucial factor to consider is the camera’s performance in low light conditions. A DSLR camera with a wide ISO range will allow you to capture clear and noise-free images even in dimly lit environments. Look for cameras with a high maximum ISO value to ensure that you can capture great shots in any lighting situation.
- 3. Lens compatibility: The versatility of a DSLR camera is greatly enhanced by its compatibility with different lenses. Make sure to check the lens mount of the camera and research the availability of lenses for it. Having access to a wide range of lenses will allow you to experiment with different focal lengths and perspectives, giving you more creative control over your photography.
- 4. Autofocus system: A fast and accurate autofocus system is essential for capturing sharp and well-focused images. Look for cameras with a wide autofocus coverage area and advanced autofocus technologies such as phase detection or hybrid autofocus. This will help you to track moving subjects and capture the decisive moment with precision.
- 5. Ergonomics and handling: The comfort and usability of a DSLR camera are important factors to consider, especially if you plan to take it on long photo shoots or use it for extended periods of time. Look for cameras with a solid build quality, comfortable grip, and intuitive controls. A camera that feels good in your hands will allow you to focus on capturing great photos without distractions.
These are just a few of the many factors that you should consider when choosing the best DSLR camera for photography. By thoroughly researching and comparing different camera models, you can find the one that suits your needs and preferences, allowing you to take your photography to the next level.
Understanding the Different Camera Settings for Digital SLR Photography
As a photographer, having a good understanding of the different camera settings is crucial in order to capture the best possible images with your digital SLR camera. These settings allow you to control various aspects of your photographs, such as exposure, focus, and depth of field. By mastering these settings, you can enhance your creativity and capture stunning photos.
One important setting in digital SLR photography is the aperture. The aperture refers to the size of the opening in the camera lens, which determines the amount of light that enters the camera. A wider aperture allows more light to enter, resulting in a shallower depth of field and a blurred background. On the other hand, a narrower aperture lets in less light, resulting in a larger depth of field and a sharper background. By understanding how aperture affects your images, you can achieve the desired visual effects and create a sense of depth and dimension in your photographs.
Another important camera setting to consider is the shutter speed. Shutter speed refers to the amount of time the camera’s shutter is open, allowing light to enter and expose the camera’s sensor. A fast shutter speed freezes motion, making it ideal for capturing action shots or fast-moving subjects. On the other hand, a slow shutter speed creates motion blur, which can be used creatively to convey a sense of movement or capture long exposures. By adjusting the shutter speed, you can capture sharp, crisp images or create interesting motion effects in your photographs.
Additionally, understanding ISO settings is essential for achieving good exposure in different lighting conditions. ISO refers to the sensitivity of your camera’s sensor to light. A low ISO setting (such as 100) is ideal for bright daylight situations, as it produces sharp, noise-free images. On the other hand, a higher ISO setting (such as 800 or above) is necessary for low-light conditions, but it can introduce more noise into your photos. By selecting the appropriate ISO setting based on the lighting conditions, you can ensure that your images are properly exposed and have optimal image quality.
In conclusion, understanding the different camera settings for digital SLR photography allows you to have full creative control over your images. By mastering the aperture, shutter speed, and ISO settings, you can manipulate various aspects of your photographs and capture stunning visuals. Experimenting with these settings and understanding their effects will help you develop your own unique photographic style and create captivating images.
Mastering Manual Mode: How to Take Control of Your DSLR Camera Settings
Welcome to the world of DSLR photography, where the possibilities are endless and the creative control is in your hands. As you delve deeper into the art of capturing breathtaking images, it’s essential to master the manual mode of your DSLR camera. By taking control of the camera settings, you can unleash your creativity and capture stunning photographs that truly reflect your vision.
One of the first steps in mastering manual mode is understanding the exposure triangle. This triangle comprises three essential elements: aperture, shutter speed, and ISO. By adjusting these settings, you can control the amount of light entering the camera, the time the shutter is open, and the camera’s sensitivity to light. Knowing how to balance these settings will enable you to create a well-exposed image, even in challenging lighting conditions.
Aperture:
Aperture refers to the opening in the lens through which light passes. It controls the depth of field, or the range of sharpness in an image. A wide aperture (small f-number) creates a shallow depth of field, allowing you to isolate a subject from the background with a beautiful background blur. On the other hand, a narrow aperture (large f-number) increases the depth of field, resulting in a larger area of sharpness from the foreground to the background. By understanding how to manipulate the aperture, you can add depth and dimension to your photographs.
Shutter Speed:
The shutter speed determines the length of time the camera’s shutter is open. It controls the amount of motion captured in an image. A fast shutter speed freezes motion, making it ideal for capturing action-packed scenes or subjects in motion. Conversely, a slow shutter speed creates motion blur, allowing you to convey the sense of movement or capture long-exposure photographs, such as smooth flowing water or light trails. Knowing how to adjust the shutter speed will empower you to capture the desired level of motion in your images.
ISO:
ISO refers to the camera’s sensitivity to light. A low ISO setting (e.g., ISO 100) is ideal for bright lighting conditions, while a high ISO setting (e.g., ISO 1600) is suitable for low light situations. However, increasing the ISO also introduces digital noise or grain to the image. Balancing the ISO to achieve the desired exposure without compromising image quality is vital. With a thorough understanding of ISO, you can confidently adjust this setting to capture clear and detailed photographs in any lighting condition.
Mastery of manual mode is an ongoing process that involves practice, experimentation, and a keen eye for composition. By taking control of your DSLR camera settings, you have the power to capture stunning photographs that truly reflect your artistic vision and tell a compelling visual story.
The Importance of Aperture: How to Use it for Creative Photography
As a photographer, one of the most important aspects of capturing compelling images is understanding and utilizing aperture. Aperture refers to the size of the opening in the camera lens that allows light to pass through. It plays a crucial role in determining the depth of field, or the area of an image that appears sharply focused, as well as the amount of light that reaches the camera’s image sensor. By manipulating the aperture settings, you can add depth and dimension to your photos, creating unique and visually stunning results.
One way to use aperture creatively is by adjusting the f-stop value. The f-stop value represents the ratio of the lens’ focal length to the diameter of the aperture opening. A lower f-stop value, such as f/1.8, means a larger aperture opening and a shallower depth of field. This is ideal for isolating your subject from the background, creating a beautiful bokeh effect where the background appears blurred and the subject stands out. On the other hand, a higher f-stop value, like f/16, means a smaller aperture opening and a greater depth of field. This setting is great for landscape photography, as it allows you to capture sharp details from the foreground to the background.
Another creative use of aperture is experimenting with different lenses. Different lenses have different maximum and minimum aperture sizes, known as the lens’ “maximum aperture” and “minimum aperture,” respectively. For example, a prime lens with a maximum aperture of f/1.4 will allow more light to enter the camera than a zoom lens with a maximum aperture of f/4. By using lenses with wider apertures, you can achieve more dramatic effects and low-light performance. Additionally, using a lens with a narrower aperture can be useful when you want to capture images with a higher level of detail.
Overall, aperture is a powerful tool in the hands of a photographer, allowing for a wide range of creative possibilities. By understanding how aperture works and experimenting with different settings, you can take your photography to the next level and capture stunning images that truly stand out.
Exploring Shutter Speed: Capturing Motion and Freezing Action
When it comes to capturing motion or freezing action in your photography, understanding and mastering shutter speed is essential. Shutter speed refers to the amount of time the camera’s shutter is open, allowing light to pass through and expose the camera’s image sensor. The faster the shutter speed, the shorter amount of time the shutter is open, resulting in a frozen image. On the other hand, a slower shutter speed allows more time for movement to be captured, creating a sense of motion in the photo.
To freeze action in your photography, you’ll need to use a fast shutter speed. This is particularly important when photographing sports, wildlife, or any other fast-moving subject. A shutter speed of 1/500th of a second or higher is usually a good starting point, but you may need to increase it even more depending on the speed of the subject. By using a fast shutter speed, you can effectively freeze the motion of the subject and capture sharp, crisp images.
On the other hand, if you want to convey a sense of motion in your photo, you can use a slower shutter speed. This technique is often used in landscape photography to capture the movement of flowing water or the streaking lights of passing cars. To achieve this effect, you’ll need to experiment with slower shutter speeds, such as 1/30th of a second or longer. Keep in mind that using slower shutter speeds may require the use of a tripod or other stabilization techniques to avoid camera shake.
By understanding how shutter speed affects your photos and experimenting with different settings, you can effectively capture motion or freeze action to create dynamic and visually striking images. Whether you’re photographing a fast-paced sports event or capturing the serenity of a flowing river, mastering shutter speed will allow you to unleash your creativity and take your photography to the next level.
ISO Settings and Noise Reduction: Balancing Sensitivity and Image Quality
When it comes to digital SLR camera photography, one of the key settings to understand is ISO. ISO determines the sensitivity of the camera’s image sensor to light. A higher ISO setting allows for better performance in low-light conditions, while a lower ISO setting produces less noise and higher image quality. However, finding the right balance between sensitivity and image quality is crucial for achieving optimal results in different shooting situations.
As a photographer, I often experiment with different ISO settings to find the best balance for each specific scenario. In low-light situations, such as indoor photography or night shots, I typically increase the ISO to achieve a higher sensitivity and capture more details in the scene. However, it’s important to keep in mind that higher ISO settings can also introduce more noise and reduce image quality. Therefore, I make sure to utilize noise reduction techniques, either in-camera or during post-processing, to minimize the noise and preserve the overall sharpness and clarity of the image.
In well-lit environments, such as outdoor daylight photography, I usually aim for a lower ISO setting to maintain optimal image quality. A lower ISO setting allows for less noise and a finer level of detail in the image. This is especially important when capturing landscapes or portraits, where image quality plays a significant role. By keeping the ISO setting low, I ensure that the image retains its sharpness and captures the subtle nuances of the subject.
In conclusion, understanding ISO settings and their impact on image sensitivity and quality is essential for achieving the best results in digital SLR camera photography. By finding the right balance between sensitivity and noise reduction techniques, photographers can capture stunning images in various lighting conditions and preserve the details and clarity that make their photographs stand out. Experimenting with different ISO settings and refining noise reduction techniques is an ongoing process that allows photographers to continually improve their craft and create stunning photographs.
White Balance: Achieving Accurate Colors in Your DSLR Photos
One of the most important settings to consider when shooting with a DSLR camera is the white balance. White balance refers to the color temperature of the light in your scene and plays a crucial role in determining the overall color accuracy of your photos. Achieving accurate colors in your DSLR photos requires understanding and adjusting the white balance settings based on the lighting conditions.
The white balance setting on your DSLR camera adjusts the colors in your photos to make white objects appear true to life. Different lighting situations, such as natural daylight, incandescent light, or fluorescent light, have different color temperatures. If your camera’s white balance setting does not match the color temperature of the light in your scene, the colors in your photos may appear either too warm or too cool.
To achieve accurate colors in your DSLR photos, you can use the auto white balance mode, which lets the camera determine the appropriate white balance setting based on the scene. However, this mode may not always produce the desired results, especially in tricky lighting situations. In such cases, it is recommended to manually set the white balance by selecting a pre-set white balance option or by using a custom white balance feature.
Overall, understanding and adjusting the white balance settings is crucial for achieving accurate colors in your DSLR photos. Experimenting with different white balance settings and understanding how they affect the overall color temperature of your photos can help you capture stunning and true-to-life images in any lighting condition.
Metering Modes: Properly Exposing Your Photos in Different Lighting Conditions
As a photographer, understanding metering modes is essential for capturing properly exposed photos in various lighting conditions. Metering modes determine how your camera measures the light in a scene and calculates the exposure settings. By selecting the appropriate metering mode, you can ensure that your subject is well-lit and the exposure is balanced.
There are typically three common metering modes: matrix, spot, and center-weighted metering. Matrix metering is the default setting on most cameras and is designed to provide balanced exposures in most situations. It evaluates the brightness and contrast of the entire scene and calculates the exposure accordingly. Spot metering, on the other hand, measures the light only in a small area, typically in the center of the frame. This mode is useful when you want to meter for a specific area or subject in the scene. Center-weighted metering is a hybrid of both matrix and spot metering, giving more importance to the center of the frame while still considering the rest of the scene.
To select the appropriate metering mode, consider the lighting conditions and the desired exposure. In a high-contrast scene with extreme differences in brightness, spot metering can help you expose for the most important part of the scene. In situations where the subject is backlit or there are strong light sources in the frame, center-weighted metering may be more suitable. Matrix metering is often reliable for general situations, providing a good balance between the different areas of the scene.
Experimenting with different metering modes and understanding how they affect the exposure can significantly improve your photography. By mastering metering modes, you can confidently capture well-exposed photos in a variety of lighting conditions, ensuring your subjects are properly lit and the details are preserved. So, next time you pick up your DSLR camera, don’t forget to consider the metering mode and make the best exposure decisions for your shots.
Autofocus Settings: Getting Sharper Images with Your DSLR Camera
When it comes to capturing sharp images with your DSLR camera, getting the autofocus settings right is crucial. With the right autofocus settings, you can ensure that your subject is in focus and the details are captured with precision. Here are some tips to help you achieve sharper images.
1. Choose the right autofocus mode
There are different autofocus modes available on DSLR cameras, such as single-shot autofocus (AF-S), continuous autofocus (AF-C), and automatic autofocus (AF-A). Each mode is designed for specific shooting situations. For still subjects, a single-shot autofocus mode works best, as it locks focus on the subject and keeps it sharp. For moving subjects, continuous autofocus mode is ideal, as it tracks the subject and adjusts focus as necessary. By selecting the appropriate autofocus mode, you can ensure that your camera focuses accurately.
2. Use the autofocus points strategically
Modern DSLR cameras are equipped with multiple autofocus points, allowing you to select the specific area in the frame on which to focus. By strategically choosing the autofocus point that corresponds to your subject, you can achieve sharper images. For example, if you are photographing a person, you can select the autofocus point that corresponds to their eyes for precise focus. Experiment with different autofocus points to find the one that works best for your subject and composition.
3. Adjust the autofocus sensitivity
Autofocus sensitivity determines how quickly your camera locks focus on the subject. By adjusting the autofocus sensitivity, you can improve the speed and accuracy of autofocus. If your camera is struggling to focus in low light conditions, you can increase the autofocus sensitivity to help it lock focus more effectively. On the other hand, if you find that the autofocus is too sensitive and frequently refocuses, you can reduce the sensitivity for more control. Fine-tuning the autofocus sensitivity can significantly improve the sharpness of your images.
By understanding and implementing the appropriate autofocus settings on your DSLR camera, you can take your photography to the next level. Experiment with different settings and techniques to find what works best for you and your subjects. With practice and patience, you can capture stunning, sharp images with your DSLR camera.
DSLR Camera Accessories: Enhancing Your Photography Gear for Better Results
Investing in accessories for your DSLR camera can significantly enhance your photography gear and help you achieve better results. These accessories not only provide practical solutions but also enable you to explore more creative possibilities. Here are some essential accessories to consider:
Lenses
A good set of lenses can make a significant difference in your photography. Different lenses have different focal lengths and can give you wide-angle, zoom, or macro capabilities. They allow you to capture different perspectives and achieve unique effects. Investing in lenses with quality optics can help you achieve sharper images with better contrast and colors.
Tripods
A sturdy tripod is a must-have accessory for any photographer. It provides stability, eliminates camera shake, and allows you to take longer exposure shots. A tripod also lets you compose images more precisely and experiment with different angles. Look for a tripod that is lightweight, yet strong enough to support the weight of your camera and lens.
Filters
Filters are useful accessories that can significantly enhance your images. They can be used to reduce glare, enhance colors, or create special effects. For landscape photography, a polarizing filter can help darken the sky and reduce reflections. Neutral density filters are useful for long exposure shots by reducing the amount of light entering the camera.
External Flash
An external flash can greatly improve your photography, especially in low-light situations. It provides more power and flexibility than the built-in flash of your DSLR. With an external flash, you can control the direction and intensity of the light, resulting in more natural-looking images and reduced red-eye effect.
Camera Bags
A good camera bag is essential for protecting and organizing your photography gear. Look for a bag that is well-padded, waterproof, and has compartments to accommodate your camera body, lenses, filters, and other accessories. A comfortable and durable camera bag will make it easier for you to carry your equipment and keep everything organized while on the go.
Investing in these DSLR camera accessories can greatly enhance your photography gear and improve the quality of your images. Whether you are a beginner or an experienced photographer, having the right accessories can open up new creative possibilities and help you capture those perfect shots.
Best digital slr camera photography settings
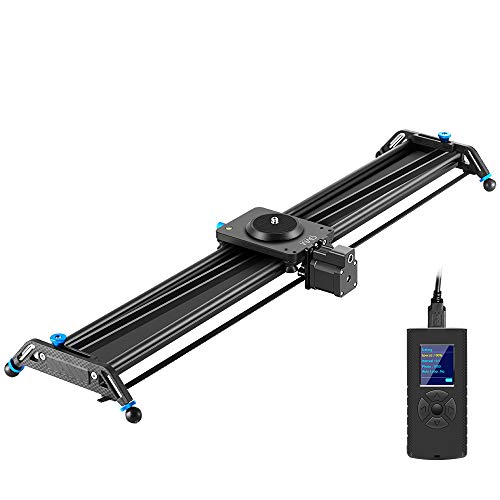
GVM Motorized Camera Slider - 31" Track Dolly
Features
| Part Number | Automatic Motorized Slider |
| Model | Automatic Motorized Slider |
| Warranty | one year |
| Color | Black |
| Release Date | 2018-10-01T00:00:01Z |
| Size | 31" Aluminum Alloy |


Canon EOS Rebel T7 DSLR - Versatile Camera
Features
| Part Number | 2727C002 |
| Model | 2727C002 |
| Warranty | 1 year manufacturer |
| Color | Black |
| Release Date | 2019-03-06T00:00:01Z |
| Size | 55mm |


| Price history for Canon EOS Rebel T7 DSLR - Versatile Camera | |
|---|---|
|
Latest updates:
|
2025-06-06
Price:
479 USD
|
88MP Autofocus 8K Digital Vlogging Camera
Features
| Part Number | DC226 |
| Model | DC226 |
| Color | Black |
| Size | compact |


Question and answers:
What are the best settings for digital SLR camera photography?
The best settings for digital SLR camera photography can vary depending on the specific situation and photographer’s preference. However, there are some general guidelines that can help achieve good results. It is recommended to shoot in manual mode to have full control over settings. The aperture, shutter speed, and ISO should be adjusted based on the desired depth of field, motion blur, and light sensitivity. Additionally, using RAW format for image capture allows for greater flexibility during post-processing. Experimenting with different settings and understanding the exposure triangle will help photographers find the best settings for their specific needs.
How should I adjust the aperture, shutter speed, and ISO on my digital SLR camera?
Adjusting the aperture, shutter speed, and ISO on a digital SLR camera depends on the desired effect and available lighting conditions. To control the depth of field, the aperture should be set to a low value (e.g., f/2.8) for a shallow depth of field or a higher value (e.g., f/11) for a greater depth of field. The shutter speed affects motion blur, with slower speeds (e.g., 1/30s) resulting in more blur and faster speeds (e.g., 1/500s) freezing motion. ISO determines the camera’s light sensitivity, with lower values (e.g., ISO 100) producing less noise but requiring more light, and higher values (e.g., ISO 1600) allowing for shooting in low-light but increasing noise. Finding the right balance between these settings is key to achieving the desired photographic effect.


